Vintage tuner prep - 07' 360 JG

Vintage, Modern, V & C Series, Signature & Special Editions

Moderators: rickenbrother, ajish4

User avatar
ric330
Intermediate Member
Posts: 752
Joined: Fri Aug 11, 2006 3:58 pm

Vintage tuner prep - 07' 360 JG

Post by ric330 »

Please, Let me first say:
I don't advocate anyone attempting this unless you are quite familiar with working on finishes.This type of work is going to void your warranty.

I've been working on guitars for 30 years and I'm always constantly researching and learning the tricks of the trade from experts like Paul W.
So please use caution and common sense before attempting a project like this.

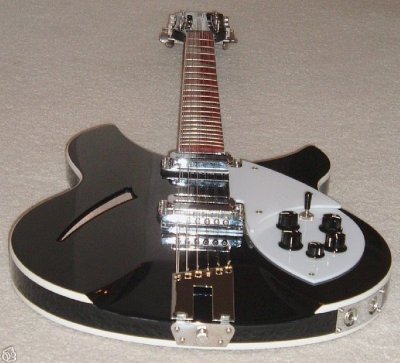
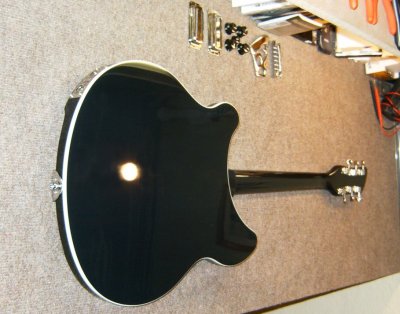
Well the 07' 360 JG is nothing less than absolutely fantastic. It is just fine out of the box BUT I just love vintage guitars and I want to vintage up my 07' 360.
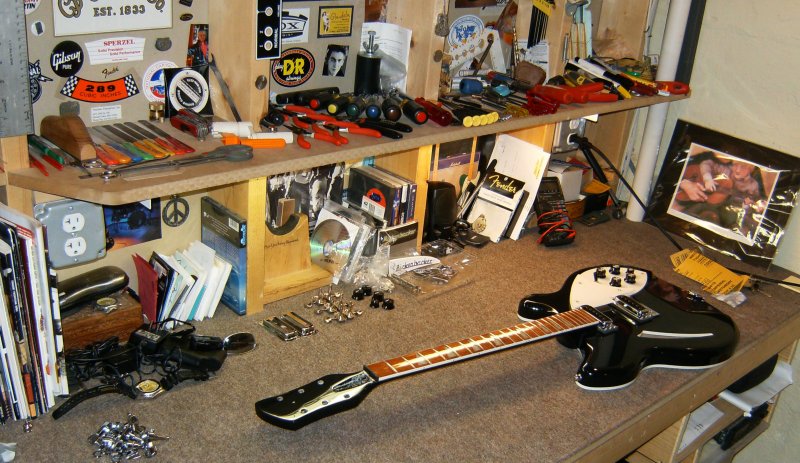
I've played this guitar to death for only owning it for 2 weeks and I'm ready to put it up on the bench.

Image

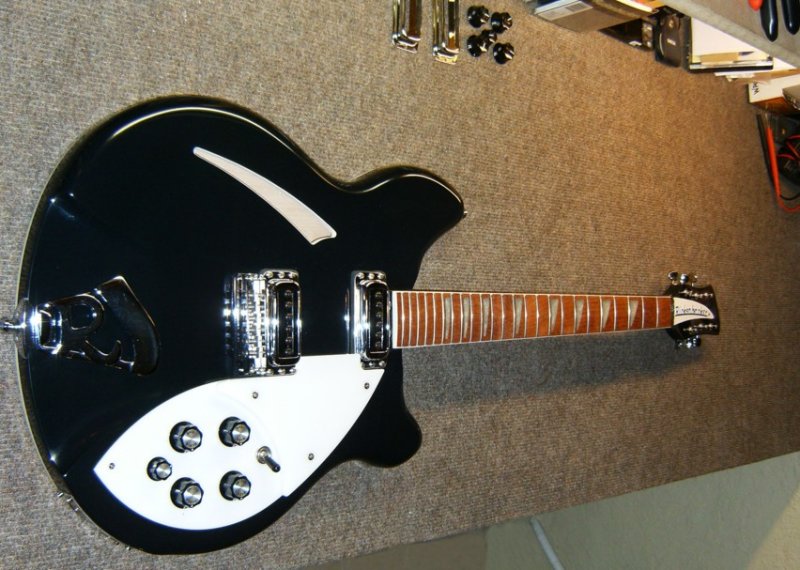
So I pulled off the strings, bridge, tail, and Schaller tuners.
Got my vintage parts from Mike and first thing is to prep for the vintage tuners.

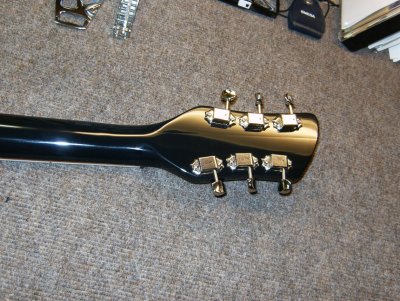
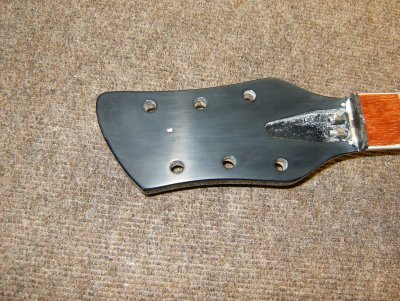
When you pull your stock Schallers off the guitar, you'll have some elephant feet impressions on the face of the headstock from the stock Scaller tuner washers which the vintage tuner bushings just won't cover. Note this is extremely evident due to the guitar finished in JG. Anyone who has owned a black car or black guitar knows what I'm talking about. Every ding, nick, and scratch shows. Here the impressions are really visible after a few strokes with 1000 sandpaper:

Image

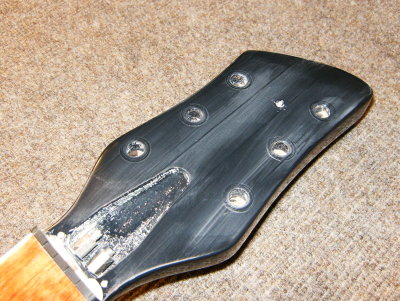
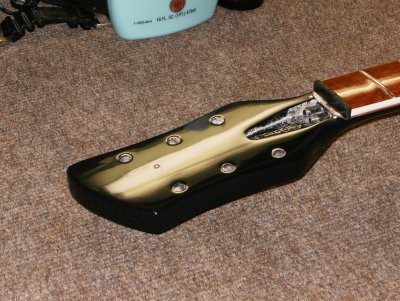
OK, now hang in there, it looks alot worst before it looks better. Now here I have sanded around the ring impressions only through the last layer of clear coat and very carefully into but not through the next layer. This is only an extremely thin depth due to careful even sanding with 1000 sandpaper. Note the low "E" washer ring impression still unsanded and the top clear coat still on at the top of the headstock, clearly visible:

Image

Still with me - I promise it gets better. After sanding the last ring out and smoothing the rest of the first layer of clearcoat off the top of the headstock with 1000 sandpaper, I then followed with 1500 and then 2000 sandpaper to get a real even surface within the second from top layer of clearcoat. I was very careful not to over sand the top edges of the headstock. The top edge was gently rolled with 2000 paper to flare into the sides of the headstock's top edge - top clearcoat. I never cut into the any black - I was only within the top 2 layers of clear and only an extremely thin amount of the top layer, of the second to top, clearcoat. Here's where we are now:

Image

Notice all evidence of ring impressions are gone. :D Now for the rewards on all this work. Hence the Scratch X and then Zymol. I carefully polished the top of the headstock at a diagonal , then an opposite angle followed by nut to top of head with the scratch X. I buffed between coats to see my results and then carried on where more fine tuning was needed. Now for the good stuff: This is where you are rewarded greatly. I used the Zymol at opposite angles again followed by nut to top of headstock. Lots of elbow grease here - working the top right to the edge of the sides, then flare from original top coat of sides to polished second from top coat of the top of the headstock. Take a look:

Image

Image

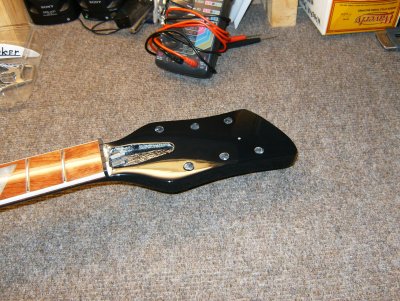
It looks like... well ...new :P What a relief. I've worked with many finishes over the years but never with Conversion Varnish as I've been told this finish is called. I must say it works rather well for someone who is used to working with finishes. I'll be installing the tuners tomorrow night.
Then on to changing the covers on the HiGains to toaster top covers, followed by vintage knobs. Mike has promised me one of the Vintage cases to for my 360 to top this project off.

So here she sits ready for the next step:
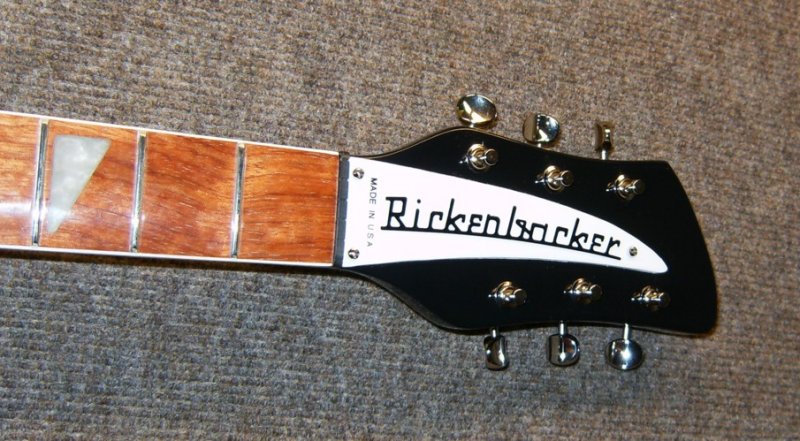
Note the original Schaller tuners bottom left on bench and the parts Mike sent me from The RIC Page (toaster covers, Vintage tuners, Vintage knobs, center of benchtop. Here you can see how wonderful the ScratchX and Zymol finished the job on the Headstock which is now ready for Vintage tuner install. This should look really fine on the smaller headstock shape for 2007.

Image
...went in to buy a 52' Tele and walked out with a 360 Jetglo...
User avatar
longhouse
Advanced Member
Posts: 2103
Joined: Fri Apr 11, 2003 6:43 pm
Contact:

Re: Vintage tuner prep - 07' 360 JG

Post by longhouse »

Wow! Looks like wet paint. That's a serious shine. Looking forward to seeing it finished.
User avatar
scotty
Senior Member
Posts: 7094
Joined: Thu Nov 22, 2007 11:27 am

Re: Vintage tuner prep - 07' 360 JG

Post by scotty »

Kevin brilliant post thanks for the info and pics(your steering me to the 360 JG big time im still nagging) This is why the new forum is brilliant cause you can see what people are talking about.I look forward to seeing the finished result.Thanks Looking for nice close ups on the body
User avatar
godber
Advanced Member
Posts: 2650
Joined: Fri Sep 16, 2005 11:07 am

Re: Vintage tuner prep - 07' 360 JG

Post by godber »

Lovely finish Kevin, I like your workspace too.

Scotty - the 360 is one of the most comfortable Rics to play, start the New Year with a new guitar!

Peter Cook's have got one for £1095
http://www.petercooks.co.uk/specials.php
Or there's this one on Ebay starting at £975
http://cgi.ebay.co.uk/Rickenbacker-360_ ... dZViewItem
User avatar
godber
Advanced Member
Posts: 2650
Joined: Fri Sep 16, 2005 11:07 am

Re: Vintage tuner prep - 07' 360 JG

Post by godber »

This place is like having a little devil on your shoulder - buy, buy, BUY.
User avatar
godber
Advanced Member
Posts: 2650
Joined: Fri Sep 16, 2005 11:07 am

Re: Vintage tuner prep - 07' 360 JG

Post by godber »

Kevin, a quick question.

I've never been brave enough to take a Rickenbacker to pieces and wouldn't really know where to start. Your workspace has a nice selection of equipment, but what is the minimum set of tools to dismantle the guitar (and put it back together!).

I'm thinking of taking all the parts off of a 330 for the Scratch-X & Zymol deep clean/shine treatment.
User avatar
jps
RRF Consultant
Posts: 37139
Joined: Wed Feb 12, 2003 6:00 am

Re: Vintage tuner prep - 07' 360 JG

Post by jps »

godber wrote:Kevin, a quick question. what is the minimum set of tools to dismantle the guitar (and put it back together!).
I hand saw and some glue. :mrgreen:
User avatar
scotty
Senior Member
Posts: 7094
Joined: Thu Nov 22, 2007 11:27 am

Re: Vintage tuner prep - 07' 360 JG

Post by scotty »

Thanks Mark I cant afford it right now I only bought the 330 in Nov BUT ive bookmarked Peter Cooks G W the prices are very good compared to my local.Thanks ill
keep them in mind also i have a plan that i hope will go into action I know someone that possibly can give me a better deal but we will see.thanks again mark for the link Cheers Scotty.
P.S i like the carpet on the workbench Kevin. Tell you what ill bring mine over for a service and a couple of beers!
User avatar
steverok
Intermediate Member
Posts: 1132
Joined: Mon Mar 14, 2005 7:16 pm
Contact:

Re: Vintage tuner prep - 07' 360 JG

Post by steverok »

You are brave, although I don't know how you'll fit the toaster covers on the new hi-gains without removing the pole pieces, thereby losing the feature of adjustable pole pieces. Also, if you've gone this far, why not switch to a trapeze tail piece ? I like the vintage knobs, otherwise, I like it stock just fine. I agree 360JG is the best model.
User avatar
ric330
Intermediate Member
Posts: 752
Joined: Fri Aug 11, 2006 3:58 pm

Re: Vintage tuner prep - 07' 360 JG

Post by ric330 »

Hey thanks for the kind words for the projects results BUT none of this would have been possible without the help, encouragement, and information obtained here on the forum.

Mark,
I got into doing my own guitar work back in High School when I got fed up with work coming back to me on my guitar and was not satisfied :? . I've asked alot of questions, obtained tools, and read so many articles in the back of guitar related magazines about setups repairs and the likes. I really enjoy working on guitars and you would too if you have the right tools and knowledge to get started. I would start with a really nice set of screw drivers in several sizes of each type of head. Example: #1, #2 Phillips. A set of Nut drivers would really help with getting Volume and tones knobs, input jacks, control switches, and threaded tuner bushings off.

You'll also probably will need some Metric and Standard Allen wrenches. A solder gun if you plan to remove or replace pickups. I'm sure there are many here that would give you plenty of other recommended tools but that should get you well equipped to take apart and adjust quite a few guitars. Try to get a hold of a garage sale junker guitar to try tasks out on that you surely wouldn't genie pig out your Rick on first try. There are so many knowledgable Guitarists here that are very happy to help with anything that arises. Thay ahve taught me quite a bit and continue to do so.

Steve,
Coming from years of Tele playing, pole piece adjustment just wasn't a luxury I'm used to. Certainly this is a real plus but for my project I am pleased with having the vintage look and raising the Higains after toaster top covers installed to make up for the string to post distance after removing the post heads. I did quite a bit of research on the Rick 360 Single bound and I couldn't find one picture of a vintage or newer 360 single bound woith anything but aN "R" tailpiece. On the 360 without top binding I really like the "R" and seems to be correct for Rickenbacker for this model. I must admit though the 360 WB VP with full vintage appointments look exquisite with the trapeze:

Image

Hey Scotty, I've got the Beer the bench and some amps. Ready to tune it up and turn it up. Cheers!
...went in to buy a 52' Tele and walked out with a 360 Jetglo...
User avatar
ric330
Intermediate Member
Posts: 752
Joined: Fri Aug 11, 2006 3:58 pm

Re: Vintage tuner prep - 07' 360 JG

Post by ric330 »

Hey I've got the Vintage tuners on.

Couple cool things is the tuner holes are drilled 2 different sizes top and bottom from the factory. Many manufacterers will drill for Schallers the larger size all the way through the headstock as the bushing and washer will cover and if tight work quite well. But, Rickenbacker drills them larger at the bottm and smaller at the top which is a tighter tolerance for these Shallers and just happen to be the correct size for the vintage press in bushing provide the finish around the top of the hole is prepped.

Cool! I always reem the very top and remove a slight bit of finish around the top so when the splines of the bushing are seating, the finish doesn't compress and buckle just the wood compresses and holds snug. I use a "C" clamp style press to slowly press the vintage bushing down evenly until seated. On the back of the headstock the vintage tuners completely cover the original Schaller impressions.

See the picture of the vintage FG headstock back, that shows that the tuner cases follow the headstock curve on the sides?:

Image

This is correct from all my research, so I have installed mine the same:

Image

Image

I'm quite pleased because there is no trace of the original Schallers in the finish Front or Back :D

Image

Image

All right, now on to the next task.
...went in to buy a 52' Tele and walked out with a 360 Jetglo...
User avatar
steverok
Intermediate Member
Posts: 1132
Joined: Mon Mar 14, 2005 7:16 pm
Contact:

Re: Vintage tuner prep - 07' 360 JG

Post by steverok »

I put a trapeze on my 360-12 but that was more for function than form.
User avatar
ric330
Intermediate Member
Posts: 752
Joined: Fri Aug 11, 2006 3:58 pm

Re: Vintage tuner prep - 07' 360 JG

Post by ric330 »

I think I just read a post about a 12 string "R" tail breaking (a black one ) just lately here on the forum.
Do you know if this was a fluke or something that has been a problem for 12 string "R" tailpiece Ricks?
...went in to buy a 52' Tele and walked out with a 360 Jetglo...
User avatar
godber
Advanced Member
Posts: 2650
Joined: Fri Sep 16, 2005 11:07 am

Re: Vintage tuner prep - 07' 360 JG

Post by godber »

Thanks Kevin, I think that I'll take your advice and play about with a cheap plank first.
Try to get a hold of a garage sale junker guitar to try tasks out on that you surely wouldn't genie pig out your Rick on first try.
Genie Pig - I do like that. I bet they have trouble squeezing out of the lamp!

Looking forward to your next instalment.
User avatar
ric330
Intermediate Member
Posts: 752
Joined: Fri Aug 11, 2006 3:58 pm

Re: Vintage tuner prep - 07' 360 JG

Post by ric330 »

Just as an update: The vintage tuners are holding fantastic. They were purchased from The Ric Page and appears to be Gotoh. They are what come on the newer late model Rics with Vintage treatment. They say "DELUX" on the back of case and underneath case hidden after install is embossed "JAPAN". They have a nice nickel plating that really gives them that vintage look. I've done an extensive amount of bending to test them out and they hold tune and work great. Better than expected.
...went in to buy a 52' Tele and walked out with a 360 Jetglo...
Post Reply

Return to “Rickenbacker Guitars: by John Simmons”