
1991 Rickenbacker 350 complete rebuild
Moderator: jingle_jangle

Re: 1991 Rickenbacker 350 complete rebuild
Yay, ric supplies Friday! Checkerboard purfling & binding have arrived, also recieved a great looking tortoise shell pickguard for my turquoise 330. I'm doing most of my work late at night after the kids go to bed and need to remove the paint when it isn't so cold outside, shooting for Sunday during the day.
Re: 1991 Rickenbacker 350 complete rebuild
Paint has been stripped and the good news is I can do amber fireglo! Took most of the day because it was below 65 all morning and the stripper (aircraft remover) had to be applied several times. Used a plastic bondo scraper to pull up the finish. Pics later...
Re: 1991 Rickenbacker 350 complete rebuild
Time to go bust out the heat gun. The center joint was already separated down most of the back & on top at the area by the pickup routes. The stripper softened the glue down this seam more and I will now have to separate the body into two halves, let it settle & glue it back together & do the same with the back. Back had to come off anyhow for the neck reset. I know that sounds frightening but I'd rather take this step than try to fill in the space on the top by the pickup routes with glue and not have it be correct.
Last edited by Dom on Mon Feb 25, 2013 4:54 am, edited 1 time in total.
Re: 1991 Rickenbacker 350 complete rebuild
Pics or it didn't happen!
Here is the album link for the 350 restoration pictures. This thread is turning into almost a Haynes manual for this guitar, based on a complete teardown & rebuild. Yeah, I know, some of these pictures scare me too. This is one hell of crash course in Rickenbacker restoration. Can't wait for finals.
http://smg.beta.photobucket.com/user/pi ... estoration
Yes, the pics are from a video camera and are not amazing or organized or anything but you'll get the idea. I also threw in pics of my Turquoise 330 with the new Tortoise shell pickguards complete with bad lighting so you really can't tell what it looks like in real life...oh well.
Back to the 350...You can now see the 2 halves and the removed back. I do have that missing piece by the neck pickup btw. Spent an hour with a heat gun evenly heating up all the glue surfaces. Since the halves were the easiest part to separate I tried out two techniques for heating. I found that starting with the neck joint area was the easiest place to start rather than starting on the sides. Once that area popped the sides went easily but I don't know that I would do this on a guitar that didn't need to be separated down the center first like this one. The wood retains the heat and once the glue gets warm enough the back pops off with some very gentle persuasion. I had to have a beer after this, I'm well past the point of all or nothin on this rebuild.
Now the back & sides have to hang loose in the music room for days & days to get back into proper shape. No diet, exercise, or nothin' for this lucky punk. After everything de-warps I need to remove the old glue and reglue the halves together. Back gets reglued & then the inside face gets cleaned up.

Re: 1991 Rickenbacker 350 complete rebuild
Thanks for the photos, Dom. Looks like it's coming along well. Can't wait to see the next batch!
I never knew that the 350 top had a chamber routed under the bridge plate. I noted that it's a real light and resonant body.
I never knew that the 350 top had a chamber routed under the bridge plate. I noted that it's a real light and resonant body.
Re: 1991 Rickenbacker 350 complete rebuild
Thanks Len! The body is really light right now.  That small rout just behind the bridge was a surprise to me too. Hey BTW, do you know any of the backstory with this guitar?
Re: 1991 Rickenbacker 350 complete rebuild
The back was warped from the stripping so after sanding the inside & outside a bit I soaked the halves in the tub for a spell, removed the excess glue then sandwiched them between 2 pieces of wood with 90 lbs of concrete bags on top. The body is clamped together so the seam is flush and will stay that way until it eases back into shape.
Re: 1991 Rickenbacker 350 complete rebuild
Unfortunately, I don't know very much. Last August, thanks to two RR Forumites who saw it in a Craigslist ad and told me about it, I bought it from a songwriter who bought it from the local Guitar Center near Portland Oregon. He later decided he was a Telecaster player. He now lives in Nashville TN.Dom wrote:Hey BTW, do you know any of the backstory with this guitar?
Re: 1991 Rickenbacker 350 complete rebuild
Funny, last year I figured out I'm not a Tele player. I kept banging my hand on that cutaway on slide runs...too used to playing Rics I guess.
Took the clamps off the body today and the warp is gone! I re-clamped it & will leave it for another 24 hours. Some light sanding on the seam is in order to clean it up, then it is time to glue and clamp it back together.
The back is almost there. Needs more time under weight & I moved it from the garage where it is cold to the music room where the body has been acclimating. I have it pressed between wood under a rack unit and my amp head...might leave it here for several days. If a new back is in order so be it...good opportunity for some flamed maple
Finish wise I've been checking out killer cans by Alsa corp. The candy tints over clear may be how I end up painting everything. Gold for the amber, a bit of orange, then blood red might do what I want.
Re: 1991 Rickenbacker 350 complete rebuild
I glued the body halves back together and things are coming along very nicely. It is a relief to see it back in one piece again. I have a small piece to glue back in where the neck pickup meets the neck. This is no biggie and will be covered up by the pickup anyhow. I'm mixing up some sanding dust & titebond to fill in a small gap in the seam where the rear strap button goes. Pics later. The back halves were pressed and are back in shape. I'll glue them together this week. Next step after that will be the staircase rout & apply the checkerboard & binding. Scraping the binding flush & sanding the body follows. Getting close to the yikes moment where I will finally have to strip & remove the back from the JG 330 so I can remove the neck. Even with scant free time, taking my time & pre-planning every move I expect this 350 to be complete within a couple months.

Re: 1991 Rickenbacker 350 complete rebuild
Sounds like it is progressing along nicely. Great that the back halves pressed flat for reuse.
Re: 1991 Rickenbacker 350 complete rebuild
Larry Davis did not remove the back from the 350 when he removed its neck. I'd guess that heat lamps and lots of judicious wiggling of the neck loosened it enough to remove it.Dom wrote:Getting close to the yikes moment where I will finally have to strip & remove the back from the JG 330 so I can remove the neck.
Pictures, please!
Re: 1991 Rickenbacker 350 complete rebuild
Glad it's gone back together successfully Dom...looking forward to seeing the pics! 
Re: 1991 Rickenbacker 350 complete rebuild
Was that on this guitar? I did read Dale Fortune's account on that method using infared heat lamps. The one thing I'm worried about is the center body seam (both back & front) getting loose along with the neck as was the case with this 350. Not that I can't reglue the halves together if need be, but if I can keep the heat localized to just the neck tongue I may be able to avoid the extra work. I also will want to clamp the eventual bass neck in place on the 330 when I set the neck just to have a bit more control over the process. Most RIC restos I've seen pics of on the web have been done that way. I also figure it will be easier to get the neck tongue shapped just right for the pocket.LenMinNJ wrote:Larry Davis did not remove the back from the 350 when he removed its neck. I'd guess that heat lamps and lots of judicious wiggling of the neck loosened it enough to remove it.Dom wrote:Getting close to the yikes moment where I will finally have to strip & remove the back from the JG 330 so I can remove the neck.
Pictures, please!
I also can't tell you how many times I thought about building a new center section and turning this thing into a double neck. Maybe on the next 350
Re: 1991 Rickenbacker 350 complete rebuild
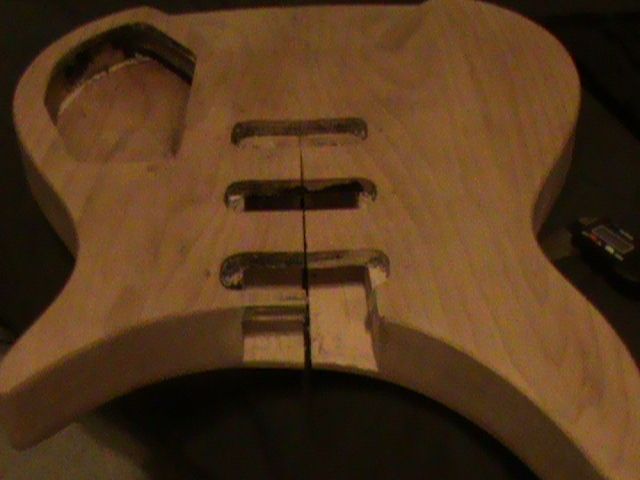
You can see how the back split after the stripping. The top was already separated like this when I got the body.
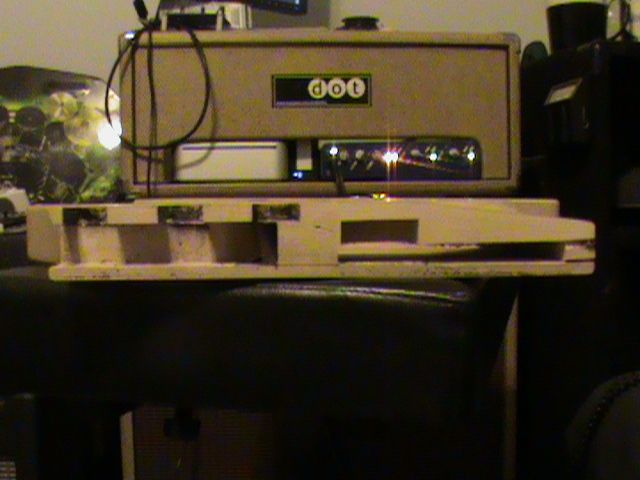
Cross section of the treble half of the guitar. That's my recording computer housed in an amp head cabinet.
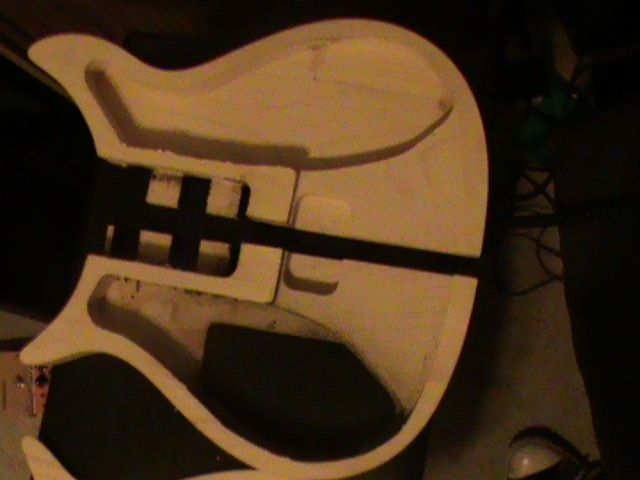
Before the body was clamped for a couple days. It was still warped from the stripping.
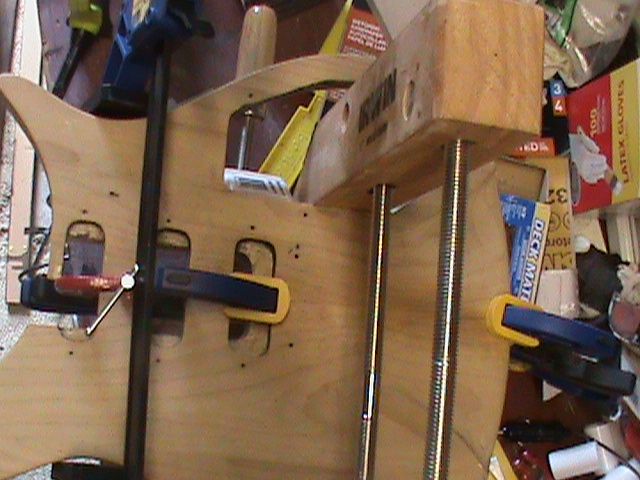
Top side clamps while the glue was drying. You can see how the center body seam is nearly invisible now. Excuse the cluttered work surface.

Note the small piece next to the neck pickup has yet to be glued back in. The clamp from the control area to the side of the body was critical to bring the top in line.
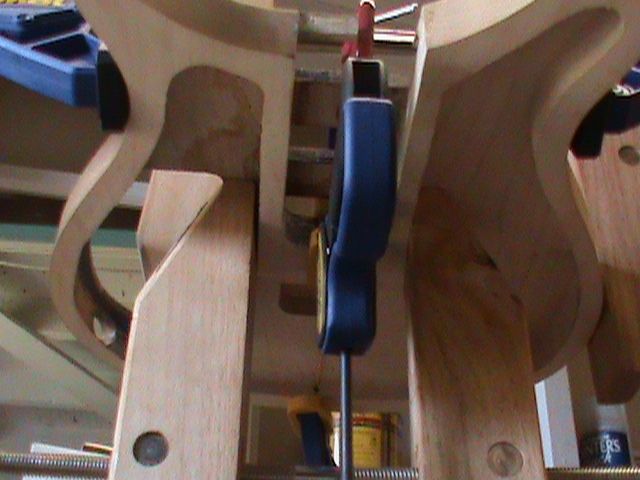
The underside clamping was just as critical. I actually tested several variations of clamp placement before doing the actual gluing. This method allowed the clamps to stand up the body during the gluing process.
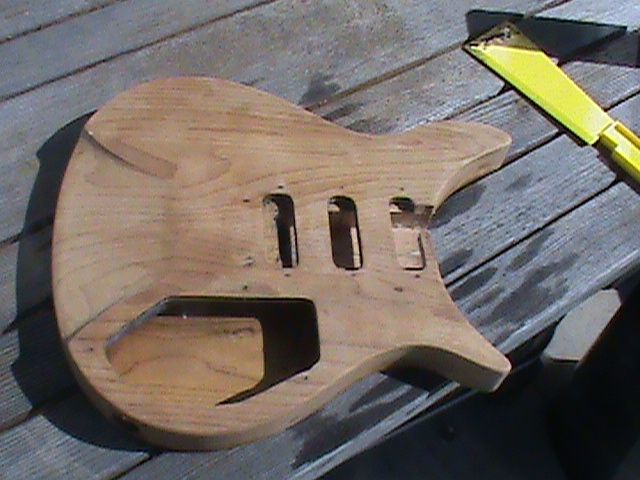
No recent shots of the body back together but this shot from just after it was stripped gives you an idea of the grain. Interesting grain follows the contour of the upper ramp. Lighter speck on the ramp is wood filler in a dent from the factory.