Ted....a bit off topic but I must offer a "thank you" for an idea you gave me for an unrelated project I'm working on. I have to repair some stair treads in my house with dowel plugs. I was debating on using small finish nails to hold a drilling guide I made but obviously I'm fixing and issue and would like to do no further harm in the process. There is no ability to clamp BTW. The hot glue should be the ticket and I'm not sure why it didn't occur to me before.....regular wood glue did but I figured the cleanup would be a hassle.
Here is an update. Paul visited here today for an inspection of the work prior to being shipped off to the capable hands of the Curmudgeon. The outer binding has been replaced. The original was too badly damaged by striping and sanding to keep. The checkerboard is the original. Here is a sample of the finished body binding.
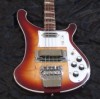
After much personal debate (and wasted binding) I decided it was time to master the skill of making those tiny little binding bumps that cap the ends of the frets. A bass of this caliber deserves a faithful recreation of it's original look. So here is how it turned out.
This was not easy to do at first. Once I got the hang of it I could move along at a pretty good pace. Here is a shot from the front. There is still some tape adhesive an other **** stuck to the fingerboard but this is very close to how it will look when it is done.
Paul has not yet decided on a color for this beauty. I have suggested that whatever it is it be transparent. It is hard to tell from the pics but there is some really nice wood here. Anyway, Paul W. has suggested a transparent orange that is similar to the Gretsch orange but in a burst. Paul B. really likes the purple of Melissa Breitsprecher's guitar. What do you guys think?
I really can't even visualize a Gretsch-orange on a Rickenbacker, but it might be cool! Can any Photoshop masters do a rendering of this? Purpleburst of course would be awesome.
I'd lean towards the OrangeBurst. PurpleBurst has been done and I think an orange Ric would look great. I would go with a transparent white if it was mine.
It is a total pain in the *** actually. First I used some heavy paper tape to mask the wood and inlays. Then I used a binding scraper to take the binding down to the fret tops. Once I got it that far, I used a file between the frets to take it down to the fingerboard level. The masking on the frets protected them from the file. Once the space between was levelled nicely, I used the frets to guide the file through the binding to make the nubs. Doing the first one takes a long time. After you do a few the pace picks up a bit and it is almost easy. ALMOST!
I have been urging Paul to go with a transparent finish so Ed's suggestion of natural (MG) would work nicely. One thing to understand here is that Paul at first believed this bass to be damaged beyond reasonable salvage. Of course that was not true. There was a truly beautiful bass under that messed up finish. I think his preference for a non-standard color and for walnut wings stemmed from his belief that making it look new was impossible. Why not go for broke then? The real assessment is that all of the wood is intact, the inlays only slightly eroded and the finish was gone. A little TLC and the magic of Paul W. and the bass will have a new life. I am grateful to have had a hand in restoring it.