The 'Beast' is being Changed
Posted: Thu Apr 02, 2009 8:43 am
The 'beast' is my affectionate term for the ol' 4003.
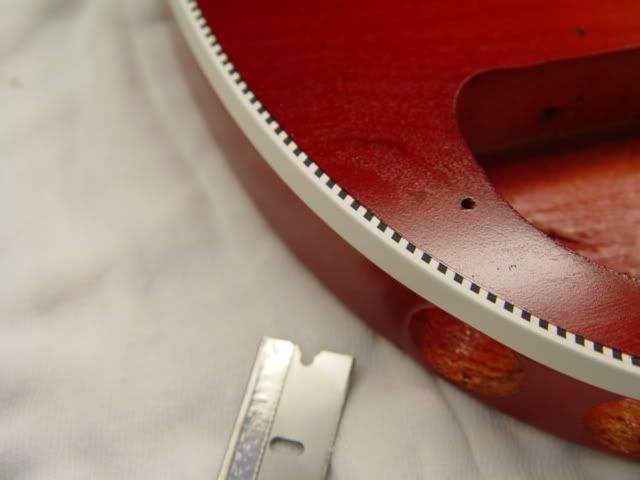
I played hooky Tuesday and started the project to ressurect the old girl. i plan to refinish it jetglo and refurbish the electronics to fix the missing sound from one of the pickups. I decided to keep the bridge stock and internals stock.
What i have discovered:
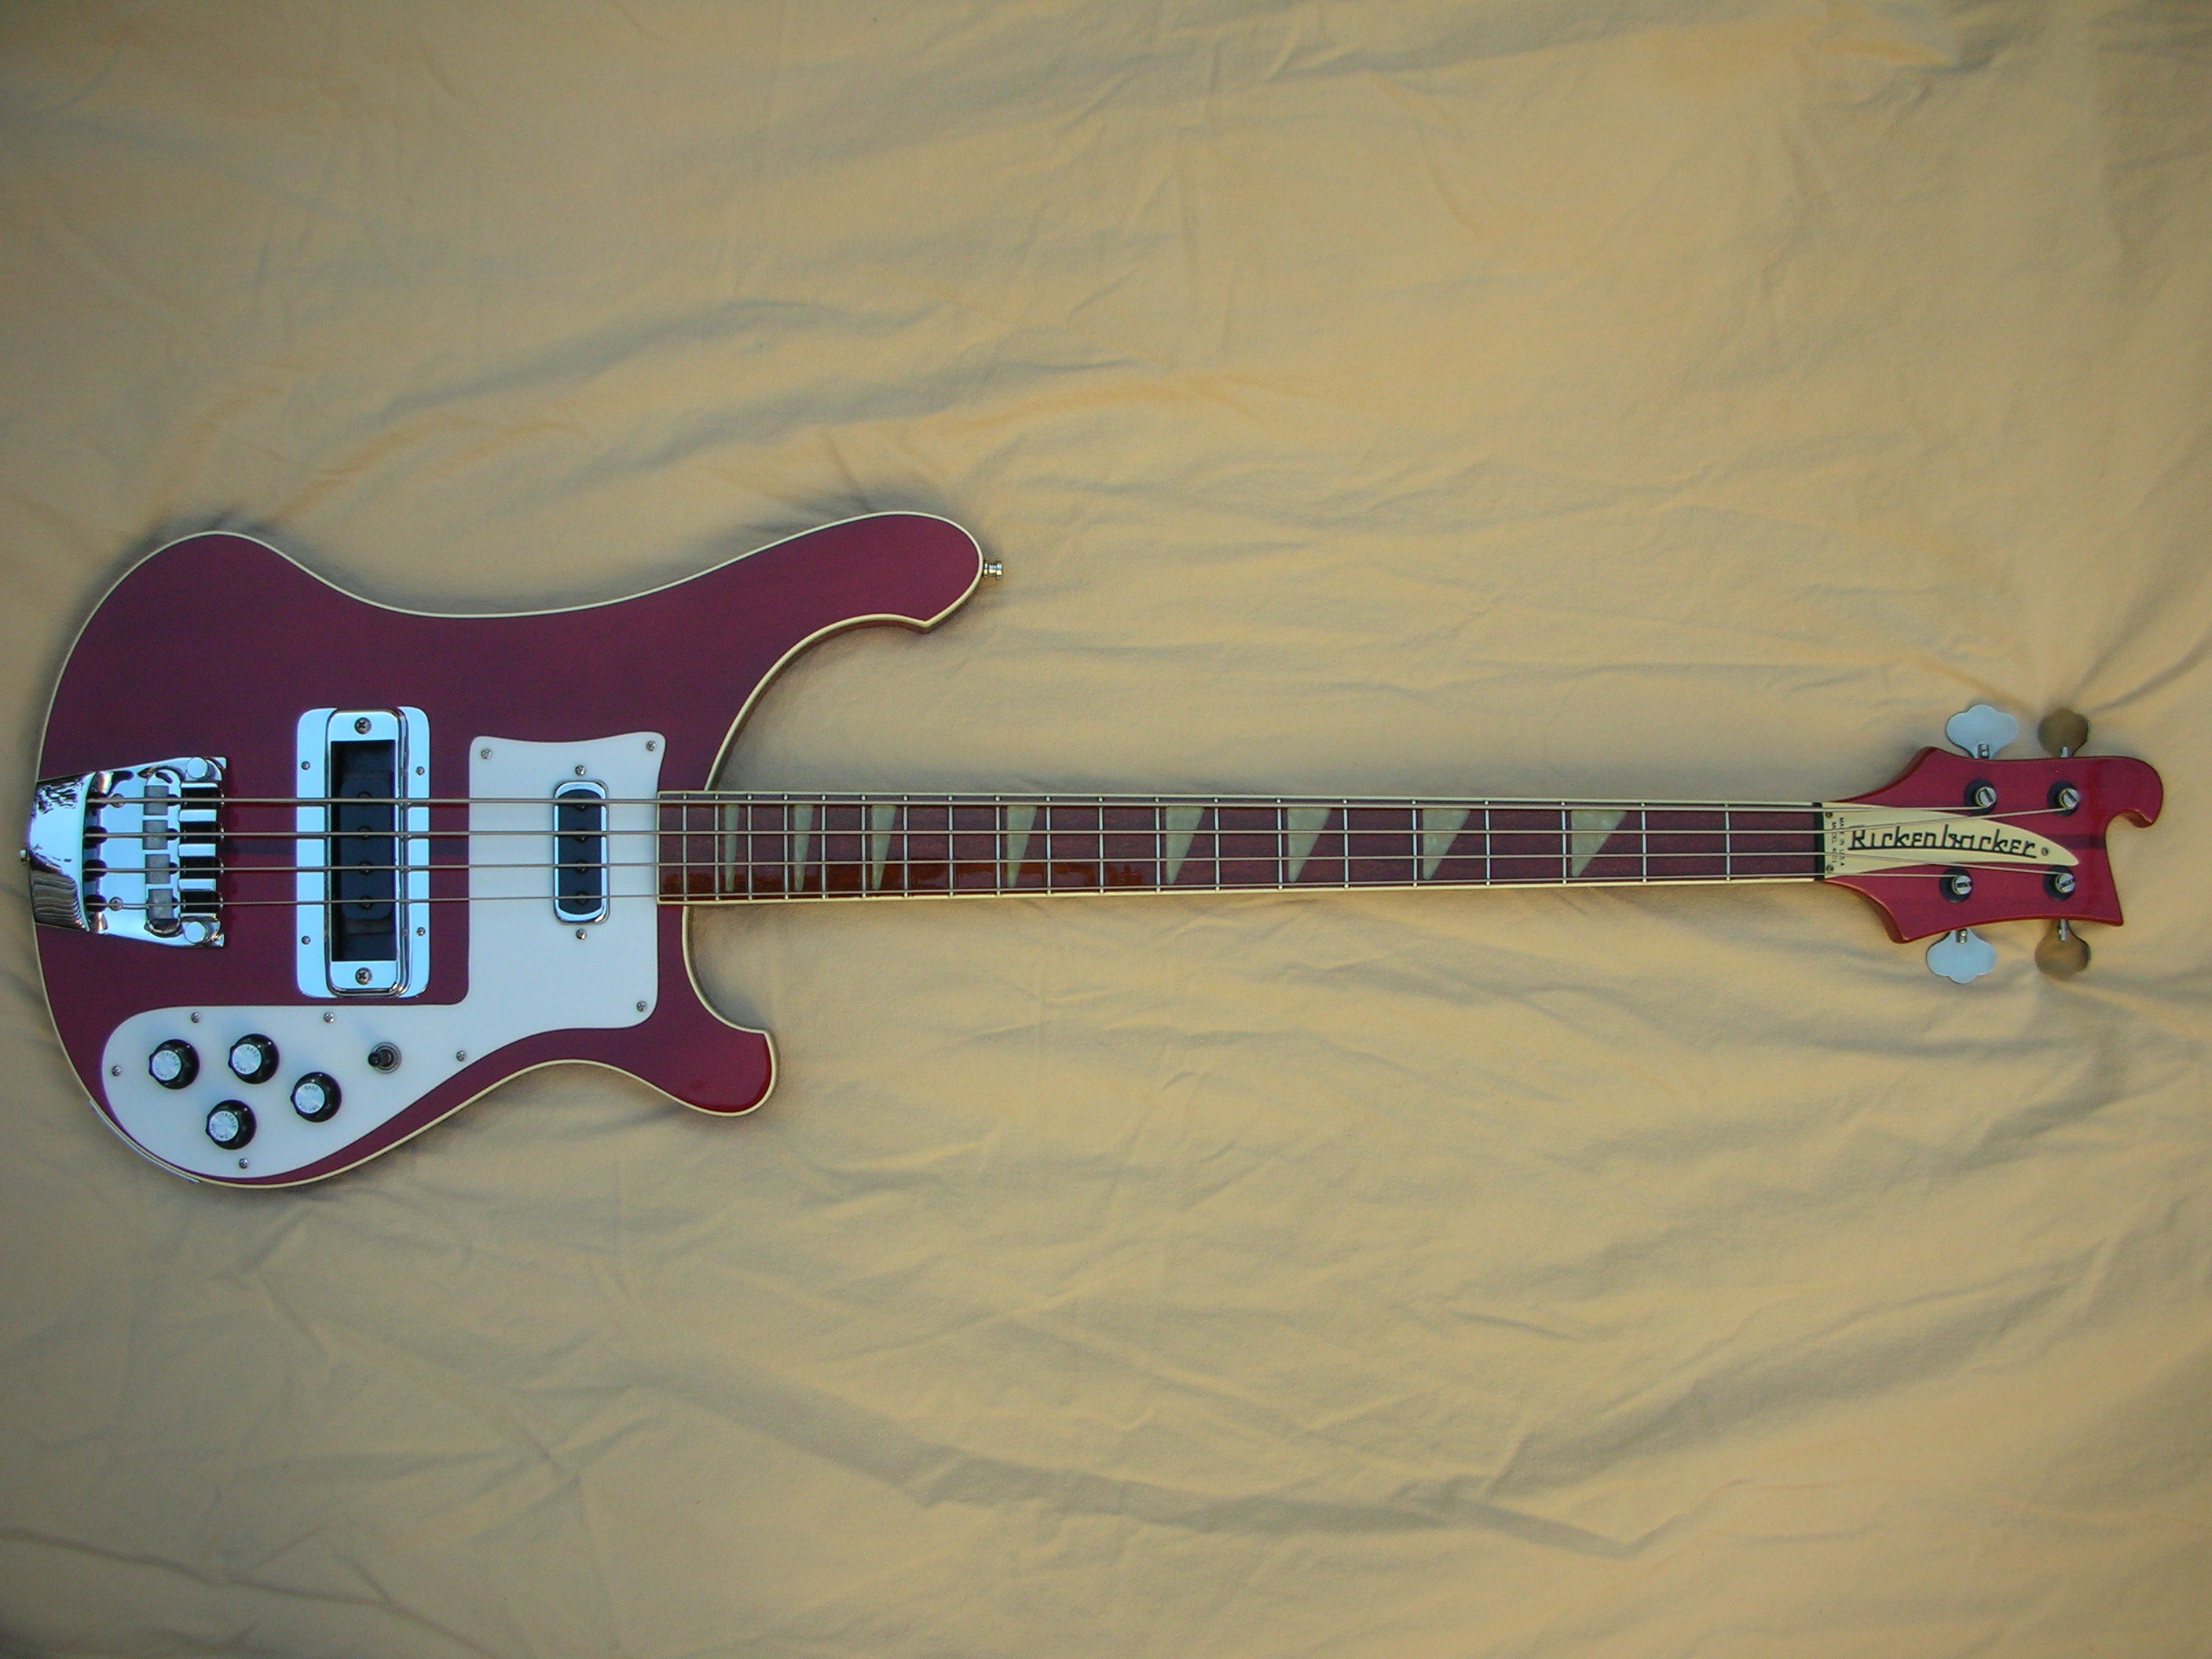
- Handwriting inside the neck pick up and control cavities. About four years ago I researched the serial number (2272) and 'thought' she was a 1982. The date on the inside said '81-07-09' (IIRC).
- One of the truss nuts (in the body) was really loose. It was not snug up to the body but away from it. (My lovely bride had the camera - so stand by for pix) So is this normal? It currently has no strings/stress on the neck. I read the prevoius posts on the neck adjustment procedure.
- The finish of the whole guitar was worse off than i thought. Upon closer inspection fine cracks in the clear varnish were everywhere.
- A deep well socket worked real well for removing the round black plastic trim from the machine heads through the head. I merely pushed them through.
- The nut is too worn and needs replacement. I 'assume' i can find parts online. The frets are okay.
- i plan to replace the trim screws throughout (kinda' rusty/shabby). I figure a trip to the hardware store for some same diameter but slighlty longer should do it. Everthing else is cleaning up nicely. i used auto polishing compound for the pick guards and chrome polish for the bright bits... Much accumulated crud (not suprised) to be cleaned out.
- I see three capacitors. I want to 'eliminate the 47 uF ' one. Is there a how-to on the site? Do i jump it or simply cut it out of the circuit? I have not done the troubleshooting of the circuit yet. i will do that first before 'fixing' the cap.
- The masking of the binding was pretty time consuming. i used 1/2 inch masking tape and used an exacto knife to make small slits so the tape could follow the curve of the body. Masking the sides was a breeze.
- i sanded the whole thing except for the fretboard and the binding with 600 grit. Fixed some dents and marks. Glued the headstock where it is seperating (from previous water damage). I then sprayed black enamel and have been sanding between coats. i 'assume' i can't wet sand because that would destroy the masking (see above). So i go through a lot of sandpaper.... I plan one or two more coats and then clearcoat. It looks 'good' so far. I feared the worst but am seeing pretty good results...
I truly can't wait until i fire it up again! WooHoo! [fistpump]
I played hooky Tuesday and started the project to ressurect the old girl. i plan to refinish it jetglo and refurbish the electronics to fix the missing sound from one of the pickups. I decided to keep the bridge stock and internals stock.
What i have discovered:
- Handwriting inside the neck pick up and control cavities. About four years ago I researched the serial number (2272) and 'thought' she was a 1982. The date on the inside said '81-07-09' (IIRC).
- One of the truss nuts (in the body) was really loose. It was not snug up to the body but away from it. (My lovely bride had the camera - so stand by for pix) So is this normal? It currently has no strings/stress on the neck. I read the prevoius posts on the neck adjustment procedure.
- The finish of the whole guitar was worse off than i thought. Upon closer inspection fine cracks in the clear varnish were everywhere.
- A deep well socket worked real well for removing the round black plastic trim from the machine heads through the head. I merely pushed them through.
- The nut is too worn and needs replacement. I 'assume' i can find parts online. The frets are okay.
- i plan to replace the trim screws throughout (kinda' rusty/shabby). I figure a trip to the hardware store for some same diameter but slighlty longer should do it. Everthing else is cleaning up nicely. i used auto polishing compound for the pick guards and chrome polish for the bright bits... Much accumulated crud (not suprised) to be cleaned out.
- I see three capacitors. I want to 'eliminate the 47 uF ' one. Is there a how-to on the site? Do i jump it or simply cut it out of the circuit? I have not done the troubleshooting of the circuit yet. i will do that first before 'fixing' the cap.
- The masking of the binding was pretty time consuming. i used 1/2 inch masking tape and used an exacto knife to make small slits so the tape could follow the curve of the body. Masking the sides was a breeze.
- i sanded the whole thing except for the fretboard and the binding with 600 grit. Fixed some dents and marks. Glued the headstock where it is seperating (from previous water damage). I then sprayed black enamel and have been sanding between coats. i 'assume' i can't wet sand because that would destroy the masking (see above). So i go through a lot of sandpaper.... I plan one or two more coats and then clearcoat. It looks 'good' so far. I feared the worst but am seeing pretty good results...
I truly can't wait until i fire it up again! WooHoo! [fistpump]


