
Having recently done a similar restoration on a cool old Harmony Meteor, I can appreciate what you're going through, Paul!
Not having binding on the guitar sure makes things simpler, eh? Slather the stripper on and let it do its thing; lots easier than sanding!
Keep the pics coming! We're loving this stuff!
FIRST INSTALLMENT--1968 335 RESTORATION
Moderator: jingle_jangle
-
jingle_jangle

- RRF Moderator
- Posts: 22679
- Joined: Wed Dec 22, 2004 6:00 am
- Contact:
The plan is to tease the cracks together and get them to a virtually invisible hairline; Autumnglo is the whole reason for all this work, and Autumnglo is what David's gonna get.
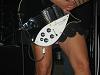
Stripper was only used for the top layers of paint (the black). For the last few days, we've been carefully sanding the primer and Bondo. The patch was removed by shaving it off with a razor-sharp chisel, a few thousandths at a time.
The wedges will remain, but will be shaped in such a way that they will be virtually unnoticeable except under close scrutinmy of the soundhole's interior. They will be small and will have undetectable effect on the guitar's sound. There are, unfortunately, no other options, due to the wood being fixed into the distorted position for so many years by the fiberglass patch.
The black in the soundhole and control cavity will be removed before any sealer or stain goes on, with a special power sanding rig that I built. It's based upon a Foredom flexible shaft tool, and is sort of a cross between a dentist's drill and a disc sander. It is very precise and controllable.
“I say in speeches that a plausible mission of artists is to make people appreciate being alive at least a little bit. I am then asked if I know of any artists who pulled that off. I reply, 'The Beatles did.”
― Kurt Vonnegut
― Kurt Vonnegut
-
larry_mondello
- New member
- Posts: 62
- Joined: Fri Dec 10, 2004 11:33 am
If it was me ... and I had a time saver sander ..or knew of a woodshop that had one , I'd make MDF templates from this body , take lots of measurements , and make a new body .
You could dulpicate it .
The hard part is the tailpiece area .. at least getting the curved areas to look right .
I bet one of those SURFORM file things would do it . They have curved ones .
If you have a router and a 1/4" edge trimming bit .. you could take one sheet of MDF .. lay it on the face .. and cut the cavity/ hole pattern ...
The speed bore bit is easy to get at any hardware store ..it looks like that is what was used to drill the pickup holes and some of the control cavity !
Once painted ... who is going to do a carbon test on the wood to see if it is stock ?
Getting the sound hole level will be a hemmorroid .
Good luck on this bird house !
guess who ?!>!

-
dale_fortune
- Intermediate Member
- Posts: 1241
- Joined: Sat Oct 30, 2004 6:00 am
Hi Lawrence I would have pulled the T.Rods 1st and chased the treads and ground the upper ends and done the back bow and replaced the tape then reinstalled them making sure they work good. Better to do it 1st than try it after the refinish is done. Pulling the frets before stripping the F.B. works best if you have a soldering iron, end nippers and the know how. Another automotive paint job. 10 coats of primer and it covers every flaw and crack. Quality work on that one. I would run the body thru the abbrasive planer taking off the top down to the X-braces, then put a new figured maple top on, cut the cats eye and bevel the edges of the ramp.
No more cracks and other issues. Bird house says it pretty well.
No more cracks and other issues. Bird house says it pretty well.
-
jingle_jangle
- RRF Moderator
- Posts: 22679
- Joined: Wed Dec 22, 2004 6:00 am
- Contact:
Guys, this is a refin, not a rebuild.
Dale, don't jump the gun yet. The stripping came first so we could ascertain the degree of repair needed. TR and fretboard next.
Lawrence, you're talking through your hat.
Dale, don't jump the gun yet. The stripping came first so we could ascertain the degree of repair needed. TR and fretboard next.
Lawrence, you're talking through your hat.
“I say in speeches that a plausible mission of artists is to make people appreciate being alive at least a little bit. I am then asked if I know of any artists who pulled that off. I reply, 'The Beatles did.”
― Kurt Vonnegut
― Kurt Vonnegut

Thanks for this detailed information Paul. The photos really point out the tremendous amount of work involved.
I can see when you start something like this you really stick to it.
Without telling too many tales out of school, is there some average amount of time it takes to strip the finish on a project such as this?
I can see when you start something like this you really stick to it.
Without telling too many tales out of school, is there some average amount of time it takes to strip the finish on a project such as this?
Life, as with music, often requires one to let go of the melody and listen to the rhythm
Please join the Official RickResource Forum Facebook Page https://www.facebook.com/groups/379271585440277
Please join the Official RickResource Forum Facebook Page https://www.facebook.com/groups/379271585440277
-
jingle_jangle
- RRF Moderator
- Posts: 22679
- Joined: Wed Dec 22, 2004 6:00 am
- Contact:
You're quite welcome, Peter.
Actually, Peter, the task appears daunting to anyone who hasn't done it, (or perhaps to anyone who has not succeeded at it!), but Dale will attest that it's fairly straightforward.
The stripping and sanding alone will represent about 12 hours' labor. This does not include the crack repair. I have only ballpark estimates as to the rest of the work, since there are still variables to be addressed.
“I say in speeches that a plausible mission of artists is to make people appreciate being alive at least a little bit. I am then asked if I know of any artists who pulled that off. I reply, 'The Beatles did.”
― Kurt Vonnegut
― Kurt Vonnegut
If I were to try it, Paul, I wouldn't start with a hollow-bodied guitar (you've got more guts than me) - maybe a bashed up Strat or Tele!! I admire your methodical and practical approach.
I've been a model maker of sorts over the years and that takes oodles of patience.... restoration is a totally different realm.
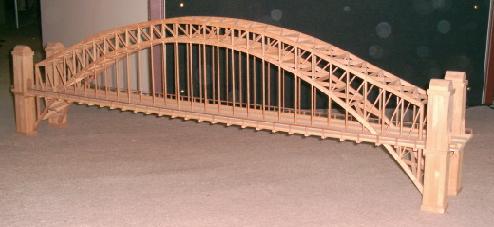
Not to hijack the thread; here's my model of the Sydney Harbour Bridge (built as a course project), made out of icy pole (craft) sticks and a few other bits and pieces (ignore the towers - they're ******):
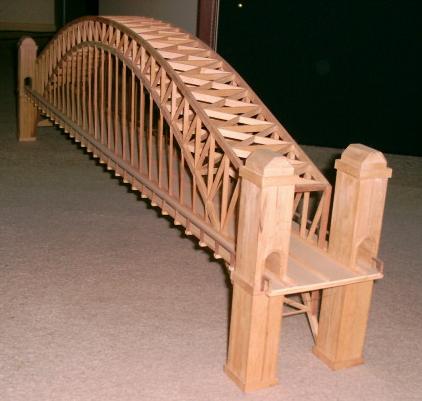
And this is 'Bluenose':


Now...... back to the restoration at hand (sorry).......
I've been a model maker of sorts over the years and that takes oodles of patience.... restoration is a totally different realm.
Not to hijack the thread; here's my model of the Sydney Harbour Bridge (built as a course project), made out of icy pole (craft) sticks and a few other bits and pieces (ignore the towers - they're ******):
And this is 'Bluenose':
Now...... back to the restoration at hand (sorry).......
"Never eat more than you can lift." - Mr. Moon

-
jingle_jangle
- RRF Moderator
- Posts: 22679
- Joined: Wed Dec 22, 2004 6:00 am
- Contact:
Howard, KOOL STUFF. Now it's time to design and build your first guitar! It's a short jump to begin, really, although the learning curve is pretty long.
Howard, good buddy, I'm not starting with a hollow body. My first restoration was a 12-string hollow body--a Framus. Turned out OK, too. That was mid-'70s. But truth be told, it's been mostly solids since.
However, Rickenbackers and their construction methods really agree with me, philosophically. They just make sense and I enjoy the way that they're built and finished!
“I say in speeches that a plausible mission of artists is to make people appreciate being alive at least a little bit. I am then asked if I know of any artists who pulled that off. I reply, 'The Beatles did.”
― Kurt Vonnegut
― Kurt Vonnegut
Again, I admire what you're doing and how you are going about it.
My mum told me I went on to solids in 1952..... ba-da bing!! (to use one of your expressions).
I did do paint jobs on some solid bodies back in the 60s (no, I'm not Auric Goldfinger!!) and they turned out fairly well. Making one from scratch - now there's a challenge. I guess if I bought a fretboard that'd be a healthy start. Design? Now that would be a real challenge. Something different - there was a toilet seat bass shown in another thread - perhaps the shape of a toilet bowl?........
"Never eat more than you can lift." - Mr. Moon
-
jingle_jangle
- RRF Moderator
- Posts: 22679
- Joined: Wed Dec 22, 2004 6:00 am
- Contact: