How to handle cracks in the neck-headstock-joint?

Vintage, Modern, V & C series, Fretless, Signature & Special Editions

Moderators: rickenbrother, ajish4

User avatar
heinpete
Veteran RRF member
Posts: 1730
Joined: Thu Jun 07, 2001 10:08 pm

How to handle cracks in the neck-headstock-joint?

Post by heinpete »

Dear Forumites! Today I came closer to my dream when bought that `74 4001FG (serial no NE 2654, red dot markers, Grover keys, nice birds eye maple)I saw in shop some time ago. It was still waiting for me. I picked it for 1000 EURO, which is quite reasonable I guess, as the frets are in an excellent shape, the neck is straight as an arrow even with 105-45 string gauge. Now comes the sad part of the story, the neck has some not sufficient repair of a headstock break. The headstock was not totally off, but some deep cracks (2 each side) go up to the second fret. The deeper ones are glued (with whatever glue?)and still fixed, but the other ones are not. Can anybody advise how to glue the remaining cracks? I thought of just letting some cyanacryl rinse all the way down the crack and then just clamp the neck at that position over night. Would that be a good idea?
Or is the a more recommended procedure?
I think this is a not so rare problem, so it might be of interest for many forumites to learn about from some of the "crack experienced" ones? Image
"The youth of today should start thinking about the state in which they want to leave this planet to Keith Richards..."! Quote by an unknown musician
User avatar
heinpete
Veteran RRF member
Posts: 1730
Joined: Thu Jun 07, 2001 10:08 pm

Post by heinpete »

...view from the other side:Image
"The youth of today should start thinking about the state in which they want to leave this planet to Keith Richards..."! Quote by an unknown musician
User avatar
jnbass
Veteran RRF member
Posts: 5359
Joined: Mon Mar 05, 2001 7:58 am

Post by jnbass »

crack kills...
Buy it before someone else does
User avatar
ajish4
RRF Moderator
Posts: 8566
Joined: Sat Oct 15, 2005 6:00 am

Post by ajish4 »

YIKES!
"Freedom of expression is important, but I have learned that people want to know how much you care before they care how much you know."
The only time a bass player gets noticed is when he stops playing.
User avatar
atomic_punk
Senior Member
Posts: 5093
Joined: Wed Sep 17, 2003 5:00 am
Contact:

Post by atomic_punk »

Ouch. Those kinds of cracks scare the heck out of me, especially since Rics have so little wood in that area.
"They make great f***'n basses". - Lemmy, NAMM 2009
User avatar
beatlefreak
Senior Member
Posts: 6160
Joined: Wed Jun 14, 2006 5:45 am
Contact:

Post by beatlefreak »

You're going to need the advice of either Paul W. or Dale Fortune, both expert luthiers/restoration experts/refinishers of Rickenbacker instruments (and both members of this forum).
Ka is a wheel.
User avatar
edski
Advanced Member
Posts: 1589
Joined: Sun Nov 28, 2004 8:27 am

Post by edski »

Ted Staberow can give good advice too.

That's not a terminal problem if fixed right. My 75 has a similar crack - although only one. Had it fixed in 1983 and it's been fine ever since. Even with a few years using mega high tension Fender flats.
Above e-mail is inactive. try ed_ardzinski@**** where **** is Hotmail.com or Yahoo.com. I tend to see things inthe hotmail box quicker...
User avatar
morrow
Member
Posts: 308
Joined: Mon Mar 14, 2005 12:09 pm

Post by morrow »

It doesn't look like fretboard lift from bad trussrod technique. What might have caused the wood to split there ?
User avatar
heinpete
Veteran RRF member
Posts: 1730
Joined: Thu Jun 07, 2001 10:08 pm

Post by heinpete »

Scot, you're right, it was an accident. The headstock was smashed against something and the stress was backwards. Even with these cracks, the neck is in perfect condition, no underbow, literally straight. Also the fingerboard is nowhere separated from the neck.
Calling TED!!!
"The youth of today should start thinking about the state in which they want to leave this planet to Keith Richards..."! Quote by an unknown musician
User avatar
jingle_jangle
RRF Moderator
Posts: 22679
Joined: Wed Dec 22, 2004 6:00 am
Contact:

Post by jingle_jangle »

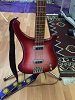
Almost all of you have seen a bass or guiar for sale that would be a perfect and desirable specimen, were it not for a badly and amateurishly-repaired neck or headstock crack such as the one above. The fretboard might be kinked as a result, or the neck twisted, but in any event, even if structurally sound, a poorly-advised repair can still be seen by the naked eye and immediately casts suspicion on the instrument's overall condition and playability.

Honestly, it pains me each time I see an Ebay auction for a Rickenbacker or other set-neck guitar with this malady. And I usuallu sit there, wondering, "why didn't the seller at least give a pro a chance to repair it?"

Pros themselves have their own favorite ways to tackle a problem such as this, depending upon what they've been taught, and also I suppose upon what has worked for them in the past, but being only human they, too, as a group, have their own varying degrees of success. Scary, huh?

There are two things to deal with here: getting the repair to act as if the neck has never split, and getting it to look the same.

The biggest problem with effecting this type of repair is getting the glue to penetrate fully into the full depth of the crack. This brings on the problem of glue selection. In a case such as this, we want the two areas bordering the break to be forced back together with an undetectable seam, yet we want to fill that seam with adhesive that is as dense and strong as the wood itself. Also, we want to use an adhesive that's impervious to moisture and temperature changes.

Although I use very little cyanoacrylate (super glue) on my customers' instruments, in this case, from experience I believe it to be the solution. The trick is to first get penetration of the crack without the wood sponging up the glue (so we would not use a so-called "water-thin" version--it would not leave enough in the crack, having spent itself into the wood's cells with little to spare for the gap), and "gel" glue--which I do NOT use for anything--would not penetrate.

My choice is a hobby glue called "Zap-A-Gap", in a neon green-labelled bottle. I purchase larger bottles for ease of dispensing.

This would be flowed into the crack, to excess. Be sure to position the bass so it won't run down the neck and make a mess of the rest of the instrument. Put newspapers on the floor to catch any spare drops.

Clamping is crucial to this sort of repair, and my choice would be a paralel-jawed clamp made out of wood, such as:

http://www.toolking.com/productinfo.aspx?productid=3936

These go be various names. I'm not sure how I'd position this clamp, but a bit of fiddling before I put the glue into the cracks would tell me where to put the clamp in order to bring the area together, without a gap.

I would not use "C" clamps. They slip and slide and invariably require cauls to position--which in any event may be necessary with the wooden clamp, too. They also mark wood unless cauls are used.

Apply glue, clamp tightly. Don't let any glue get between the clamp jaws and the neck proper. There should be some excess glue flowing out of the crack. This is desirable--it shows penetration.

Wipe off excess carefully. Let sit undisturbed overnight. Depending upon what you find when you unclamp. it might be necessary to sand and buff, or possibly refinish, the neck in the area of the previous split.
“I say in speeches that a plausible mission of artists is to make people appreciate being alive at least a little bit. I am then asked if I know of any artists who pulled that off. I reply, 'The Beatles did.”
― Kurt Vonnegut
User avatar
jnbass
Veteran RRF member
Posts: 5359
Joined: Mon Mar 05, 2001 7:58 am

Post by jnbass »

and there you have it!
Buy it before someone else does
rickfan60
Senior Member
Posts: 5395
Joined: Sun Apr 11, 2004 5:00 am

Post by rickfan60 »

I agree with Paul. The problem here is getting enough glue into the crack to effect a bond. Some cracks can be opened wide enough to use wood glue but wood glue must be diluted to penetrate deep into a narrow crack like that one. I have used medium viscosity cyanoacrylate cut with a little thin cyanocacrylate to get into narrow spaces. Thanks for the tip on the Zap-A-Gap Paul. I have used both soft-jawed bar clamps and wooden Joergensen style clamps as Paul suggests. Soft bar clamps won't mar the finish and don't require a caul. The wooden clamps provide considerably more pressure which is critical for this operation. Carefully clean up any squeeze out as it will stick to the finish.
User avatar
ken_j
RRF Consultant
Posts: 4216
Joined: Fri Jul 18, 2003 5:31 am
Contact:

Post by ken_j »

I would consider a syringe to apply the glue if there is any gap that it could be inserted into. If the cracks crosses into the truss rod channel I would remove the rods until the glue dries. Glue on the rods may prohibit proper function. Excess glue that enters the channel can be cleaned with a small patch of cloth on a rod similar to the way you would clean a gun.
"The best things in life aren't things."
User avatar
bassduke49
Senior Member
Posts: 6580
Joined: Wed May 14, 2003 5:00 am

Post by bassduke49 »

Zap-A-Gap is my favorite for filling gaps in my (now retired) career subject: plastic model airplanes. It has the consistency of maple syrup right out of a fresh bottle. I don't recommend trying to use a syringe, though, as rather quickly, it will set up in the narrows and ruin the syringe. Disposables make the waste less costly, but it will still be a hassel. I use the bottle nozzle and apply (to small areas) with a toothpick, or just let it drip out and flow into larger areas. Working time is a few minutes in thin applications, much longer with large areas. Full cure is about 24 hours. Wipe off with a lint free cloth as soon as you can, but wiping will make any glue spread thin set right away, so move quickly or your cloth will be a new part of your finish. Cyanoacrylates have tremendous tensile strength, but relatively weak shear strength. That is, separating force perpendicular to the joint surface will have little result, but a force parallel to the surface can crack the glue more easily. In this situation, the forces of concern would be working against the tensile strength, so the glue is ideal for that kind of break.
Author: "The Rickenbacker Electric Bass - 50 Years As Rock's Bottom"
User avatar
jingle_jangle
RRF Moderator
Posts: 22679
Joined: Wed Dec 22, 2004 6:00 am
Contact:

Post by jingle_jangle »

Yikes! In all my detail, I forgot to mention:

PULL THE RODS!
“I say in speeches that a plausible mission of artists is to make people appreciate being alive at least a little bit. I am then asked if I know of any artists who pulled that off. I reply, 'The Beatles did.”
― Kurt Vonnegut
Post Reply

Return to “Rickenbacker Basses: by Joey Vasco & Tony Cabibe”