
Anatomy Of A Rickenbacker Bass Part 4
Moderators: rickenbrother, ajish4
Re: Anatomy Of A Rickenbacker Bass Part 4
I would like to thank everyone for their attention. Digging around a bit I found a detailed post from Paul, rcommending PPG2042. Now if I can only find a reseller in my area. (PAsadena, CA).
Re: Anatomy Of A Rickenbacker Bass Part 4
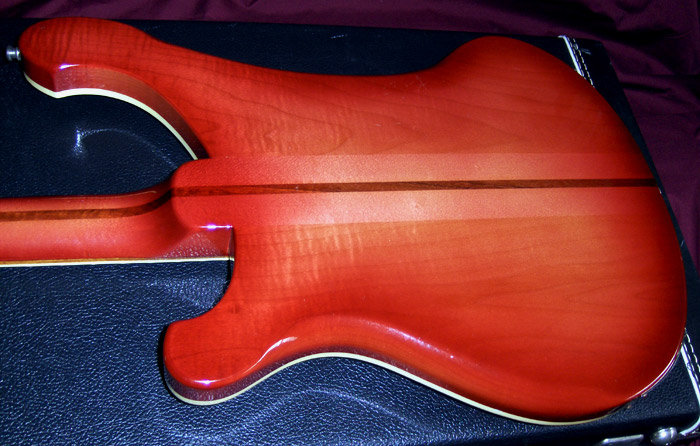
As promised, here are photos of the break that needs to be finished over.
Also I've included a shot of the back of the entire bass. Notice how dark the area around the break is. I am 99% sure this is a refinish, but I wonder if anyone has ever seen an original Fireglo that looks like this.
Bt now I am having second thoughts. My original idea was to atake it down to the wood and then airbrush it with finish and blend it into the surroundings. I did this with another break and the break can hardly be seen. But this is my first time working on a Ric. And after an email from Paul W, ot may not be possible to get a good match without using some CV and CV requires a lot of non-standard sprayin equipment. Plan B is to avoid taking it down to the wood and just overspray the area. But that would mean making it even darker.
Any Comments/Ideas?
- Attachments
-
-

Re: Anatomy Of A Rickenbacker Bass Part 4
That was definitely badly refinished, probably to try and hide the cracks. if it were mine I would refinish the whole bass in a solid color.

Re: Anatomy Of A Rickenbacker Bass Part 4
I don't know.... If I had the talent to spray, I would consider just sanding the darkened area, blend an FG as best I could, and overspray a clear coat. I would think a body shop could spray CV. The rest of the bass looks like a beautiful FG.
Re: Anatomy Of A Rickenbacker Bass Part 4
Yes, from the front the fireglo is gorgeous and in pretty good shape for the age. So I'm inclined just to try and make it look better. I worse comes to worse, I do nothing and it will only look terrible from the back.
I just did some sanding primarily to flatten the areas arond the cracks, but partially to feel out the overspray. The interesting part to me is that was is coming off appears to be cherry colored. So it looks like it was a colored overspray with no clearcoat. But if it was cherry as seems to be coming off, why did it ed up looking so dark?
I just did some sanding primarily to flatten the areas arond the cracks, but partially to feel out the overspray. The interesting part to me is that was is coming off appears to be cherry colored. So it looks like it was a colored overspray with no clearcoat. But if it was cherry as seems to be coming off, why did it ed up looking so dark?
-
rickenbrother

- RRF Moderator
- Posts: 13236
- Joined: Sun May 26, 2002 5:00 am
Re: Anatomy Of A Rickenbacker Bass Part 4
Did that 4001 come from the GC in Brea?
JETGLO should officially be renamed JETGLO ROCKS! 
-
rickaddict
- Senior Member
- Posts: 6163
- Joined: Mon Mar 29, 2004 7:46 am
Re: Anatomy Of A Rickenbacker Bass Part 4
That one looks a whole lot like my '76 4001, pictured below. (PB 1275)
http://www.rickresource.com/register/us ... llsize.jpg
Probably the same guy sprayed them both.
Too bad about the break and the re-fin. That one was definitely refinished. The rest of the finish does look beautiful though. I don't know how much of a perfectionist you are, but for me I'd probably go for a full re-fin, possibly to a darker color like Burgundy. Maybe one of the masters could do a partial re-fin and get it looking right. And maybe you have spray booth talent that I haven't factored in.
Good luck, and welcome to the Forum.
-
rickenbrother
- RRF Moderator
- Posts: 13236
- Joined: Sun May 26, 2002 5:00 am
Re: Anatomy Of A Rickenbacker Bass Part 4
Ah, I just checked the one in that GC was Burgundy.
Yours looks similar to my '79, just a little darker than mine, but the difference could be the lighting or the camera.
Yours looks similar to my '79, just a little darker than mine, but the difference could be the lighting or the camera.
JETGLO should officially be renamed JETGLO ROCKS!
Re: Anatomy Of A Rickenbacker Bass Part 4
Gorgeous, both. And it looks very close to that '76. I wonder if they were sprayed by the same guy. Mine was made in March.
This came off eBay from someone in San Francisco.
I often by damaged good like this to fix up. But this is my first attempt to fix a Ric. So thanks for all the help.
This came off eBay from someone in San Francisco.
I often by damaged good like this to fix up. But this is my first attempt to fix a Ric. So thanks for all the help.
Re: Anatomy Of A Rickenbacker Bass Part 4
Charlie, I forgot, welcome aboard!

Re: Anatomy Of A Rickenbacker Bass Part 4
Just bringing this back to the surface since it's about the finishes.
Ben Hall just mentioned over on the RIC site that production of the full UV cured finishes started week 16 of 2010. There were a few that required some touch up work so those have CV, but everything else from then on is UV cured...
Ben Hall just mentioned over on the RIC site that production of the full UV cured finishes started week 16 of 2010. There were a few that required some touch up work so those have CV, but everything else from then on is UV cured...
I have NO idea what to do with those skinny stringed things... I'm just a bass player...
Re: Anatomy Of A Rickenbacker Bass Part 4
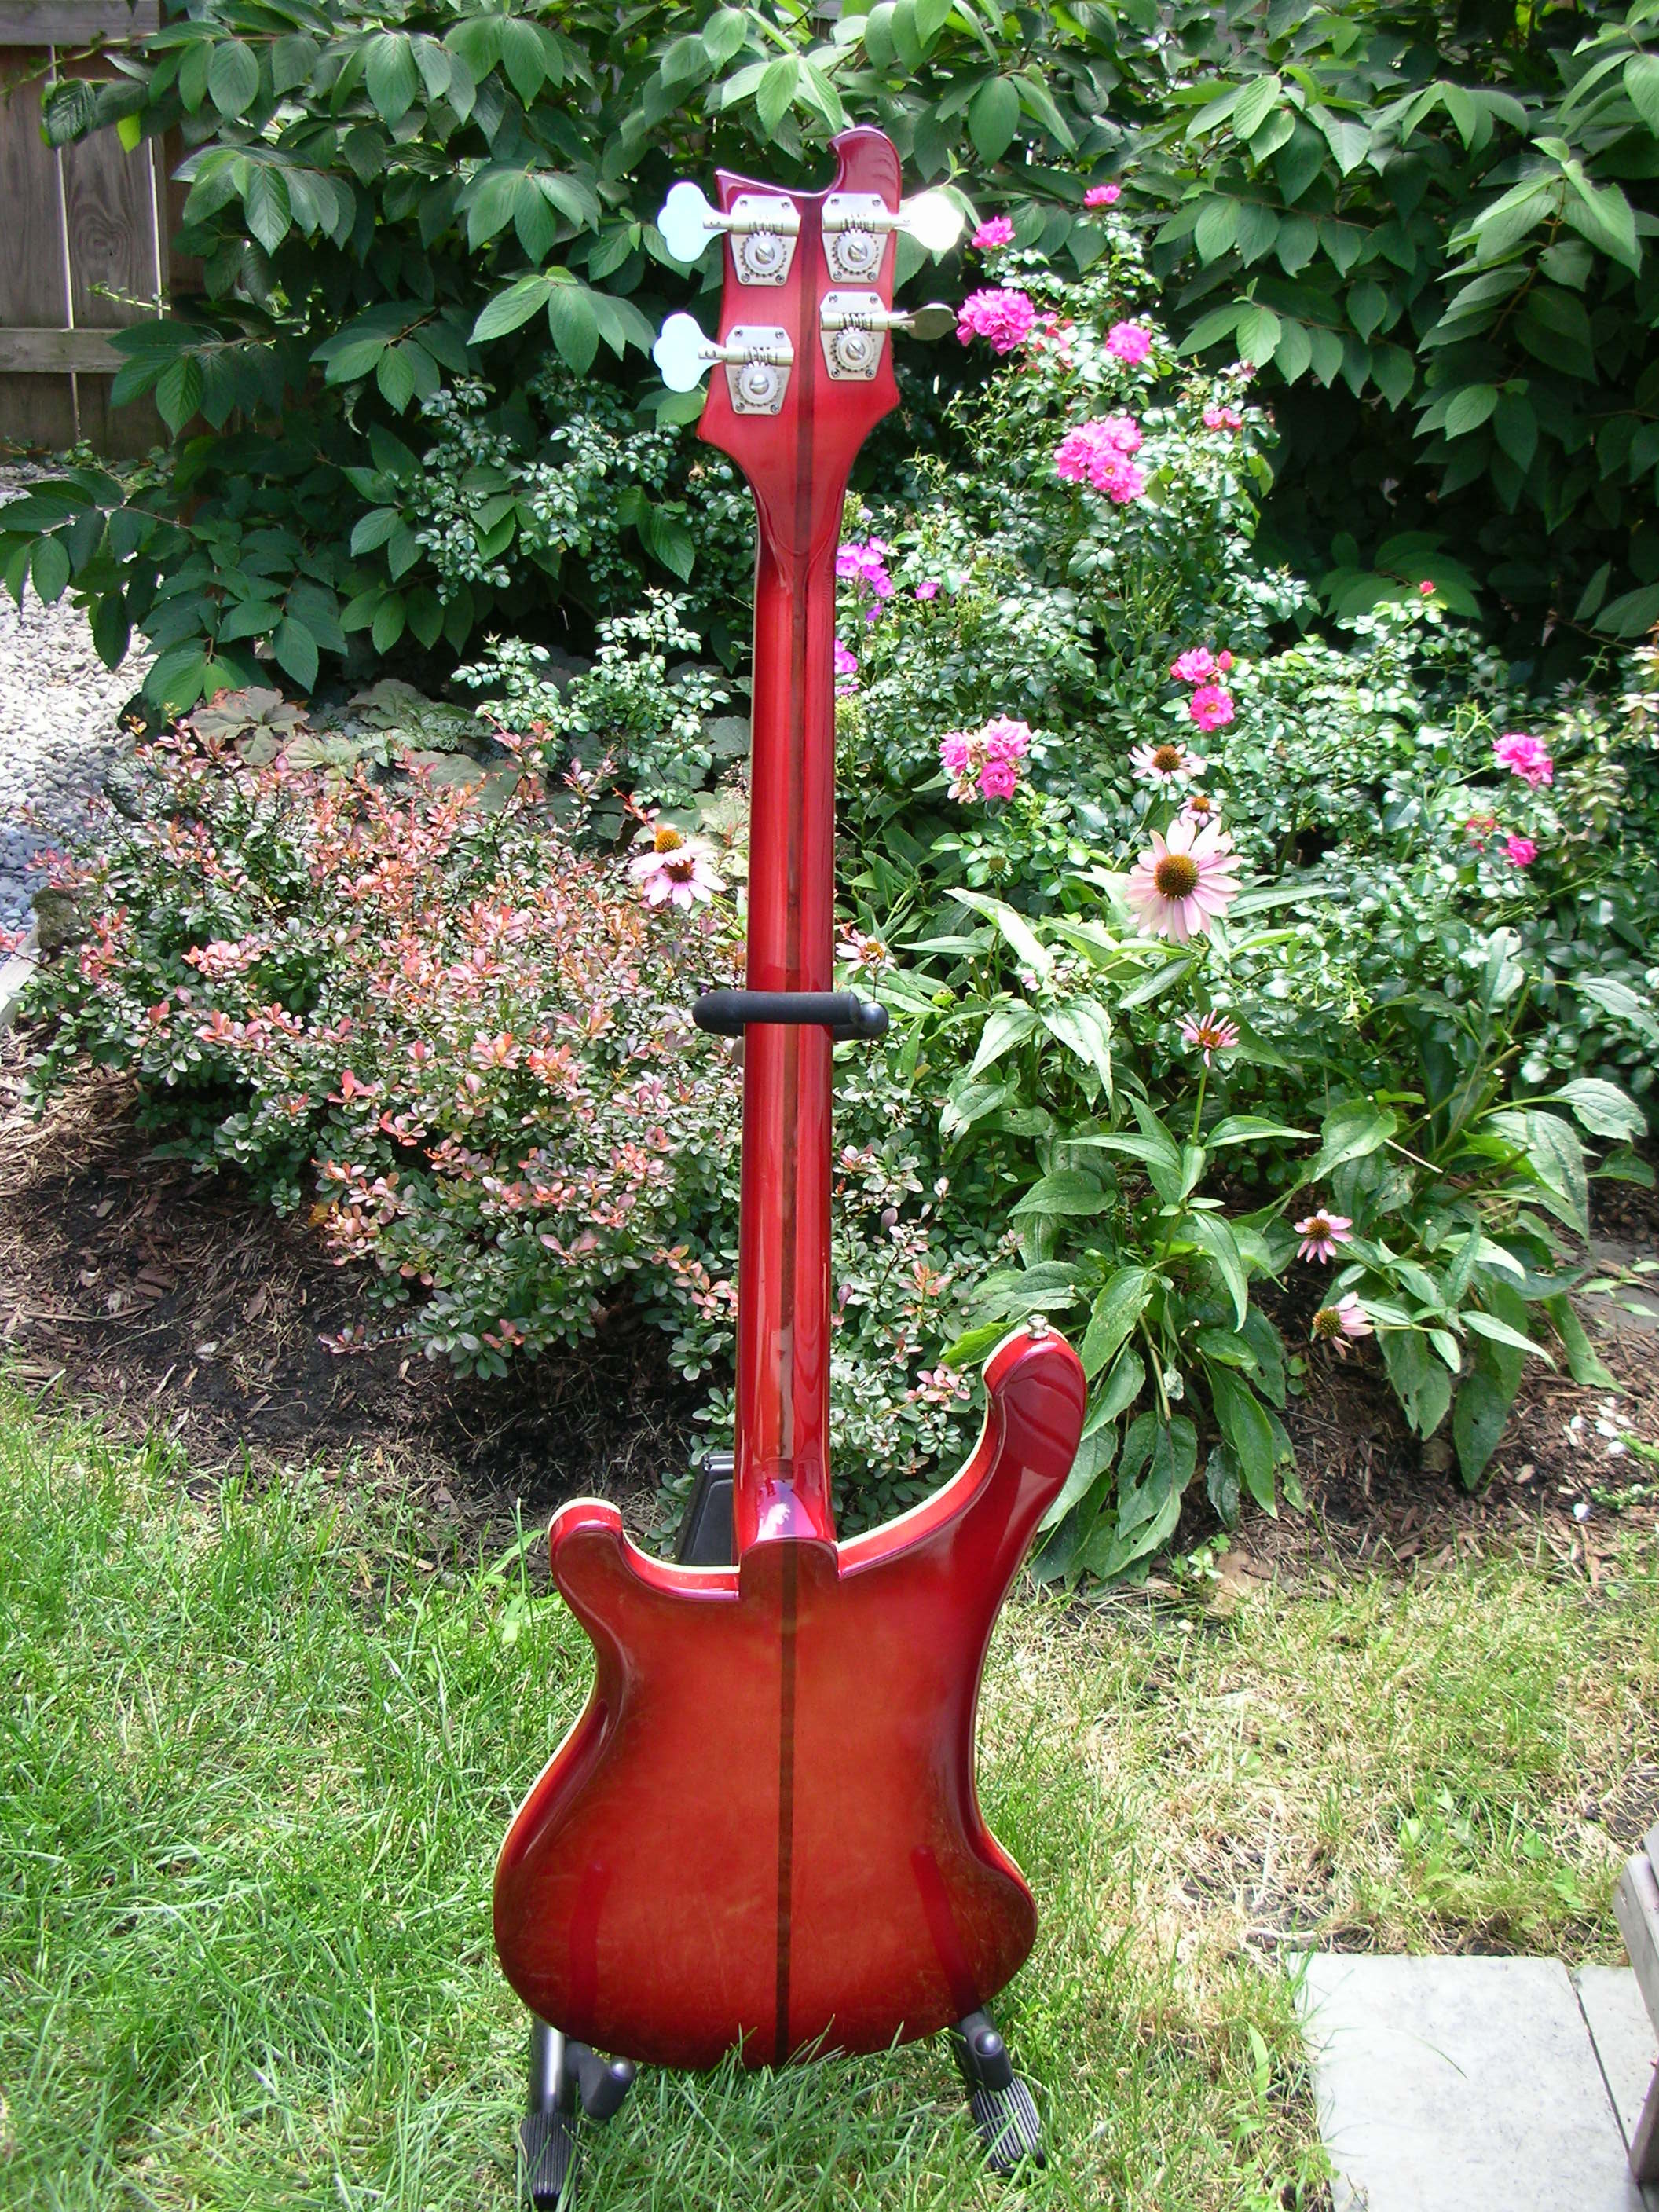
Just in case anyone cares, here is how the whole thing turned out. I include before and after pictures. In the end I scraped and sanded off the darkened finish and then did my best to airbrush a replacement. It ain't perfect (no you can't look close) but it would take a close look to notice the fix - if you weren't looking for it - so I am happy.
It took so long partially because I did the refinish three ime, but mostly because it needed new truss rods and it took forever to get them.
Oh and it plays great.
Charlie Campbell
It took so long partially because I did the refinish three ime, but mostly because it needed new truss rods and it took forever to get them.
Oh and it plays great.
Charlie Campbell
- Attachments
-
-
-
-
-
FretlessOnly

- Advanced Member
- Posts: 1605
- Joined: Sat Feb 21, 2009 9:00 pm
Re: Anatomy Of A Rickenbacker Bass Part 4
Charlie, it looks like you did a nice job with it, and you still get to retain the original finish on the rest of the bass, which looks great too.
Can we have everything louder than everything else?
-
RicOSoundMan

- Member
- Posts: 203
- Joined: Tue May 11, 2010 8:36 pm
Re: Anatomy Of A Rickenbacker Bass Part 4
Thanks for the work and thought you put in this. I love it was and is very informative.
My Ric Basses are:
76' 3000 MG ---09' 4003 MG
77' 3001 MG ---92' 2060 FG
77' 4001 Jetglo---93' 2060 FG
Other
08' Fender "Geddy Lee" Sig. Jazz Bass
82' Kawai F-II-B
76' 3000 MG ---09' 4003 MG
77' 3001 MG ---92' 2060 FG
77' 4001 Jetglo---93' 2060 FG
Other
08' Fender "Geddy Lee" Sig. Jazz Bass
82' Kawai F-II-B
Re: Anatomy Of A Rickenbacker Bass Part 4
Charlie, you did a really fine job on this. I am impressed. As John said, you retained the original finish and blended it in very well. I zoomed the full back picture and I do not see the fracture, and the blending looks original. Kudos sir!