

I found a black TRC which I was looking for, only thing is; the man pretty much refuses to send outside CONUS. Would anybody be willing enough to be a middleman to get this TRC to the Netherlands? You'll get a little compensation.
If interested, contact me through PM!
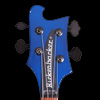
Edo
Restoring a '76 4001
Moderators: rickenbrother, ajish4

Re: Restoring a '76 4001
Edo, another alternative is to paint the TRC you have then lightly sand the top off the lettering to the white plastic. Viola, you have a black TRC with white lettering.Grainger wrote:I found a black TRC which I was looking for, only thing is; the man pretty much refuses to send outside CONUS. Would anybody be willing enough to be a middleman to get this TRC to the Netherlands? You'll get a little compensation.
If interested, contact me through PM!
Edo
I agree - that bass has very nice maple.
Re: Restoring a '76 4001
I know that's an option, the thing is; I want to keep it white, so I could change back to white if I wanted to.
Again, I'm asking for a kind person who would act as a middleman for sending the TRC! I'll compensate any time taken!
Please, anybody, please consider! It would make me happy and I will be grateful!
Again, I'm asking for a kind person who would act as a middleman for sending the TRC! I'll compensate any time taken!
Please, anybody, please consider! It would make me happy and I will be grateful!
Re: Restoring a '76 4001
PM me the details, Edo.Grainger wrote:I know that's an option, the thing is; I want to keep it white, so I could change back to white if I wanted to.
Again, I'm asking for a kind person who would act as a middleman for sending the TRC! I'll compensate any time taken!
Please, anybody, please consider! It would make me happy and I will be grateful!
Re: Restoring a '76 4001
You could also opt for another solution and just buy more Ricks so you can rotate parts between basses more easily. 
68 4001|73 4001 MG|75 4000 MG|81 4001S AZG|86 4003 MID/BT|86 4003 Shadow|88 4003s Blackstar|89 4003 Grey/BT FL|93 4004 Ci|96 4003S/8 FG|98 4003S/5 JG|05 650D|05 4004Cii/5 TG|08 660/12 JG|18 4003S/5 MID|19 4003S/5 WAL ||TR35B|RB 30||
Re: Restoring a '76 4001
Well Bert, you know I have BH 4003 with a black TRC, but I don't want to get that off of it.
Re: Restoring a '76 4001
Moving along, getting the wood block out of the bridge/mute bar cavity.

Small X-acto knife for the start

Made a small edge along the original edge to prevent the chisel from shooting underneath the lacquer íf I slip...

Larger chisel, go!

Plywood, what was this guy thinking!?

About 30 minutes later, holding my chisel overcontrolled fearing a frack up

Plywood's gone, now for the glue...

Tight, isn't it?

My victims!

Groundhole cleared, it was clotted with glue

And then I screwed on the bridge. The mutebar is too wide for the cavity, the bridge leans on the body through the mutebar. Damn it!

Measuring

Comparing


Right, just a millimeter too wide.
You'll kill me for this, but I cut away about 1 mm on each side so the mutebar would fit...

As a piece of would was cut out, the bridge sits a bit deeper. Keeping his *** up with some coins

No visible trace of the hole which held the BadAss bridge

As on the top, which you look down on whilst playing, there's quite the visible scar... Too bad...

What I noticed; this bridge does not have the usual Ric-taillift. It's totally level with the body... Weird...
No, you're not mistaken. The bridge is crooked. Sideways as well as in height (although the heightdifference on both corners to the puphole is just a 1 millimeter difference)


Quick check on the lining of the strings, keeping in mind that the bridge is crooked. Thank god, it's lined!

Now for something else. The trussrods. On the 4001 they look like this, pointed into the headstock.


As a comparisson I checked my 4003, which looked alot neater...


Now my question is, is there something wrong with my 4001 trussrods? Will it last and be a ***** to set up, or is there something seriously wrong with 'em?
Small X-acto knife for the start
Made a small edge along the original edge to prevent the chisel from shooting underneath the lacquer íf I slip...
Larger chisel, go!
Plywood, what was this guy thinking!?
About 30 minutes later, holding my chisel overcontrolled fearing a frack up
Plywood's gone, now for the glue...
Tight, isn't it?
My victims!
Groundhole cleared, it was clotted with glue
And then I screwed on the bridge. The mutebar is too wide for the cavity, the bridge leans on the body through the mutebar. Damn it!
Measuring
Comparing
Right, just a millimeter too wide.
You'll kill me for this, but I cut away about 1 mm on each side so the mutebar would fit...
As a piece of would was cut out, the bridge sits a bit deeper. Keeping his *** up with some coins
No visible trace of the hole which held the BadAss bridge
As on the top, which you look down on whilst playing, there's quite the visible scar... Too bad...
What I noticed; this bridge does not have the usual Ric-taillift. It's totally level with the body... Weird...
No, you're not mistaken. The bridge is crooked. Sideways as well as in height (although the heightdifference on both corners to the puphole is just a 1 millimeter difference)
Quick check on the lining of the strings, keeping in mind that the bridge is crooked. Thank god, it's lined!
Now for something else. The trussrods. On the 4001 they look like this, pointed into the headstock.
As a comparisson I checked my 4003, which looked alot neater...
Now my question is, is there something wrong with my 4001 trussrods? Will it last and be a ***** to set up, or is there something seriously wrong with 'em?

Re: Restoring a '76 4001
Great documentation Edo, I believe you can lift the nuts on the truss rods with a thin screwdriver(clamp the neck first). Hopefully someone with more experience will chime in.
-
bassduke49

- Senior Member
- Posts: 6580
- Joined: Wed May 14, 2003 5:00 am
Re: Restoring a '76 4001
Not a criticism, but it looks like that bridge (and probably the tailpiece) are an Allparts product, not genuine RIC. That may be why it didn't quite fit and/or is crooked. Hmm.
Author: "The Rickenbacker Electric Bass - 50 Years As Rock's Bottom"

Re: Restoring a '76 4001
I thought the shiny saddles on the bridge looked a little off. Your bass is shaping up nicely.
Re: Restoring a '76 4001
I have an other bridge, from an old '73 4001. I screwed that one on there, still crooked. Weird, cause I used the old screwholes that were in there...
The shiny saddles can be replaced, from the '73 4001 as well
The shiny saddles can be replaced, from the '73 4001 as well
Re: Restoring a '76 4001
Very nice, Edo. As for the rods, can you loosen the nuts any with needle nose pliers? Any way you can get them loose, try. Then pull them back, remove the nuts and bar, and pull the rods. Then evaluate if you can just straighten the threaded ends or if you need to cut them off and rethread.
Beautiful pics and documenting.
Beautiful pics and documenting.
-
rickenbrother

- RRF Moderator
- Posts: 13236
- Joined: Sun May 26, 2002 5:00 am
Re: Restoring a '76 4001
I love all these project threads with pictures that have been posted lately.
Thanks for sharing Edo, looks like you're doing a fine job!
Thanks for sharing Edo, looks like you're doing a fine job!
JETGLO should officially be renamed JETGLO ROCKS!

Re: Restoring a '76 4001
Great project thread, Great pictures too! Almost like being there!Grainger wrote:I have an other bridge, from an old '73 4001. I screwed that one on there, still crooked. Weird, cause I used the old screwholes that were in there...
The shiny saddles can be replaced, from the '73 4001 as well
I guess the crooked bridge is because the holes were drilled wrong. I suppose they used a template back then and drilled them manually, so if the template slipped a bit, the holes were off a little.
Now, in this modern age of CNC controlled machinery, the holes should be much closer to perfect. One would think that this sort of offset wouldn't happen. But, you'd be wrong... My 2008 4004Cii has a crooked bridge too...
I have NO idea what to do with those skinny stringed things... I'm just a bass player...
Re: Restoring a '76 4001
Back from the luthier. I was there to pick up my JCS, which I also brought back to original condition  (I bought it, butchered from all it's hardware, no pick up, nothing! You have no idea how hard it is to find a JCB-1 pick up!)
Well, enough about this non-Ric
I took the Ric with me to discuss the refretjob. Eventually we agreed on removing the binding and tapping out the frets sideways. When that's done the top will be fixed. Filling the extra screwholes with maple, sanding it down to top level. The bridgecavity will be filled with maple.
I guess I'll even let the bridge screwholes get filled with epoxy as well and let the bridge be reset so it's not crooked anymore.
Knowing myself and my eye for details and my hatred for anything that's out of sync...
The top will be resprayed.
This things getting quite a budgetupgrade, but it will be worth it!