
I was intrigued by this mod. I had noticed the occasional hum issue with my 2007 4003, although it was not a frequent problem. It mostly happened at home and not at gigs. On the other hand, why wouldn't you want the option to cancel hum, when needed? For rock music, where I typically use both pickups full-on, it seemed like an ideal situation. After reading his description I tackled it and came out successful. But I was nervous doing the job; that I got it right the first time was a bit of skill and probably a bit of luck. Either way I was spared some frustration. The result was not even a slight change in tone, just an OCD-soothing absence of hum in the pickup blend mode. Years later this pickup configuration is still going strong for me; I recently gigged the 4003 and it was a show-stopper. Lots of compliments.
I recently decided to do this again for a second bass. It's the second time I've done this mod and I've made a photo tutorial for others who want to do the same.
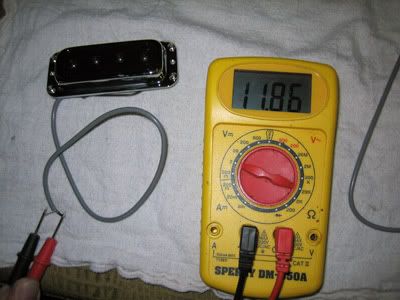
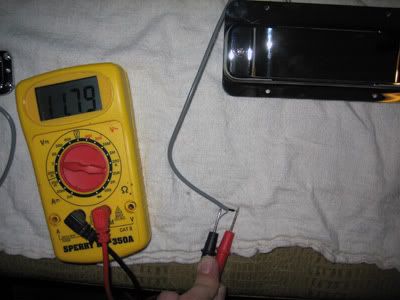
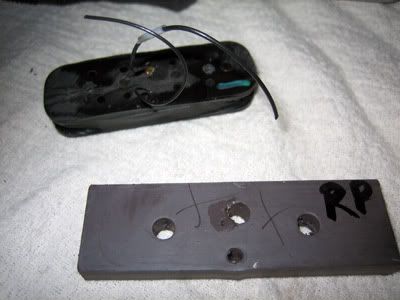
1. Measuring the pickups--two single coils with fairly similar resistance are ideal for canceling hum.
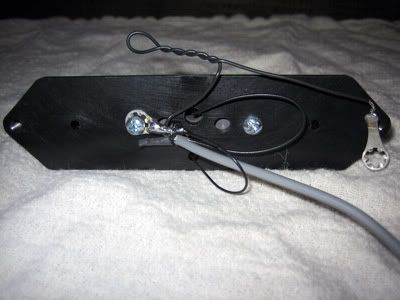
2. Observe what the bottom of the pickup looks like for reassembling it. An eyelet connects the ceramic magnet to ground, as well as the lead shield and a second eyelet that grounds the pickup surround. Closer inspection of the primary eyelet shows the grounded end of the coil soldered to it and the hot end of the coil in a heatshrink-covered joint with the lead wire. These joints will have to be spliced.

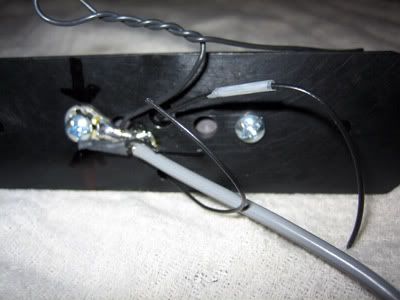
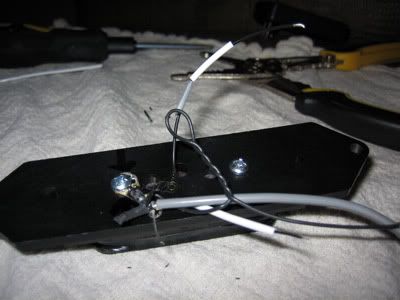
3. I like to "label" the stock ground wire of the pickup coil with a piece of Scotch tape. This will be spliced back as the hot wire after reassembly. Cut the hot and ground connections on the coil side leaving a 0.5'' section behind so you can strip them later and have a decent-sized lead.
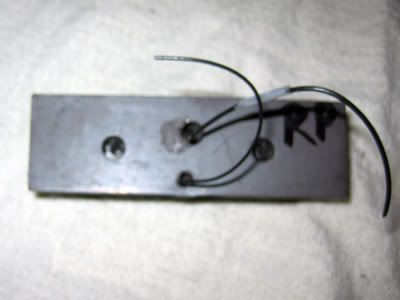
4. Remove the bobbin from the magnet and label the side that faces the bobbin "RP" (for reverse polarity). Rotate it 180 degrees horizontally, and put the cut leads back through the same holes in the magnet.
5. Remember to line up the bobbin and the magnet so that the screws will connect.
6. Reassemble the magnet, bobbin, and phenolic baseplate. Put heat shrink on the coil leads before soldering them in their new configuration (the one with the Scotch tape on it goes to the pickup lead wire).
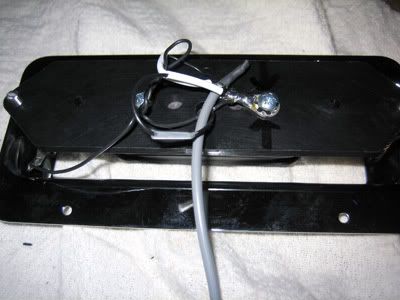
7. This is how my pickup looks after reassembly. I measured it with the multimeter and it measures about 100 ohms higher than before--probably heat from the soldering iron creeping into the coil. In a few hours it will go back down to the room temperature value.
There you have it! Just some free info for those seeking it... hope it helps you, whoever you are.
cassius