

Coming up nice. Wayne. The maple is nice. Don't be afraid of sanding down, Squire's is a bit thinner due to a couple sandings. Looks like the neck was cracked due to incorrect truss adjustments and also the headstock broken off. Looks like it is repaired nicely.
Settling in with my popcorn.....
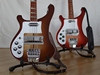
Ready to start on the Wreckenbacker
Moderator: jingle_jangle

Re: Ready to start on the Wreckenbacker
Just filled a load of holes. Photo's tomorrow...
E = Fb
Bass player's theory of relativity...
Bass player's theory of relativity...
Re: Ready to start on the Wreckenbacker
This is what I did earlier today. I'll sand it all flush tomorrow.
- Drilled out the plastic wood
- Knocked the plugs in and put a bit of sawdust around the top of the pin to (hopefully?) fill the edge chipping.
- Just a couple of holes surplus to requirements...
- I don't know why these holes are here and even though they won't be seen with the pickguard on, I didn't want them there.
- I clamped the little piece of maple there so that I could drill the existing holes out without the drill wandering off. I left it clamped there when I knocked the plugs in.
E = Fb
Bass player's theory of relativity...
Bass player's theory of relativity...
Re: Ready to start on the Wreckenbacker
I shaved and sanded the plugs down today.
- I made a bit of a hash of filling these holes as when I took the little maple block away, I could see that the plugs hadn't gone all the way to the bottom of the holes so I re-drilled and filled them again.
- I also filled the chip on the edge of the pickup route.
- The holes in the back of the body came up ok.
- As did all the extra holes in the headstock.
E = Fb
Bass player's theory of relativity...
Bass player's theory of relativity...
Re: Ready to start on the Wreckenbacker
Where did you find a plug cutter for such small plugs?
Smallest I’ve found are for 6 mm plugs, but the plugs you’ve cut seems like 3-4 mm.
Re: Ready to start on the Wreckenbacker
Lol, I'm doing the easy bit at the moment, sanding back flat surfaces. Anyway, Stewmac has the plug cutter.Wiker wrote:Doing some fast progress. Very nice work. Interesting to watch.
Where did you find a plug cutter for such small plugs?
Smallest I’ve found are for 6 mm plugs, but the plugs you’ve cut seems like 3-4 mm.
http://www.stewmac.com/shop/Tools/Routi ... &xsr=11843
- Using a drill press, you can make lovely little 2.7mm plugs
E = Fb
Bass player's theory of relativity...
Bass player's theory of relativity...

Re: Ready to start on the Wreckenbacker
Nice Wayne, good luck it's really coming along!
Re: Ready to start on the Wreckenbacker
Oh, that new piece of equipment from StewMac.basshead wrote:Lol, I'm doing the easy bit at the moment, sanding back flat surfaces. Anyway, Stewmac has the plug cutter.Wiker wrote:
Where did you find a plug cutter for such small plugs?
Smallest I’ve found are for 6 mm plugs, but the plugs you’ve cut seems like 3-4 mm.
http://www.stewmac.com/shop/Tools/Routi ... &xsr=11843
And you’re using the screw extractor to make small plugs – smart
Thanks. I've just order that set.
Re: Ready to start on the Wreckenbacker
Watch the video they have there. You have to cut the plugs on an edge (like my pic) to avoid overheating the cutter. It makes perfect little plugs tho.
E = Fb
Bass player's theory of relativity...
Bass player's theory of relativity...

Re: Ready to start on the Wreckenbacker
What is nice about making these plugs is that you can get the grain in the right direction. Dowels have the grain running the length of the dowel which in incorrect for this application.
"The best things in life aren't things."
Re: Ready to start on the Wreckenbacker
True but even though I took care to line the grain up, they're all slightly off. I reckon they must twist slightly as you're tapping them in. I'll be painting the Wreckenbacker so not that big of a deal but at least the holes are filled properly so no shrinkage like the plastic wood this old thing was full of...ken_j wrote:What is nice about making these plugs is that you can get the grain in the right direction. Dowels have the grain running the length of the dowel which in incorrect for this application.
E = Fb
Bass player's theory of relativity...
Bass player's theory of relativity...
Re: Ready to start on the Wreckenbacker
I used a bit of the shedua I bought, to make a couple of plugs to plug the two holes that were in the skunk stripe on the headstock. Once they were in I decided that the match was spot on, even though the piece I bought and the original skunk stripe, looked quite different.
I went and had a piece cut off the little block of shedua today, then I glued it between two pieces of maple. I'll get that cut into smaller blocks then shape them into repair pieces for the pickup cavity and the bridge route. The block looks a really good match at the moment though.
Lol, even though I can see how the neck how the neck is constructed and have read how the neck is constructed, I completely forgot that I should have cut the maple pieces into half again, then rotated the pieces closest to the shedu 90 degrees. Ah well, the repairs are purely decorative so I guess I can live with it...
E = Fb
Bass player's theory of relativity...
Bass player's theory of relativity...
Re: Ready to start on the Wreckenbacker
Aside from sanding or using stripper, is there anything else that will remove the colour in all the cavities. Sanding will just be tiresome and the only paint stripper I can get out here is "Ace" brand general purpose paint stripper. I'm loathe to use the stripper as it needs to be neutralized with water and then there's the worry that a little bit of stripper may get left behind, which would bugger up the new paint.
Is there a solvent that will soften the paint?
Is there a solvent that will soften the paint?
E = Fb
Bass player's theory of relativity...
Bass player's theory of relativity...
Re: Ready to start on the Wreckenbacker
I repaired the strap button holes today as both the original holes had been stripped out. The body hole had been filled with some sort of dowel and stripped again then another hole had been drilled beside the original. I was able to use a 2.7mm plug to fill the second hole but needed a 1/4" plug to fill the original.
The screw hole in the top horn looked like it too had been filled, drilled and filled again but with plastic wood. I drilled it out and used a 3/16" plug to fill it. The second hole that had been drilled is a double hole. For whatever reason, a hole was drilled, filled with wood and drilled again right beside it. When the glue dries, I'll drill out the second hole, which will also drill out half the plug I already glued in, then fill it with another plug
E = Fb
Bass player's theory of relativity...
Bass player's theory of relativity...
Re: Ready to start on the Wreckenbacker
I found the reason for the second hole - a broken screw in the first. Stewmac's screw extractor kit came in very handy!
E = Fb
Bass player's theory of relativity...
Bass player's theory of relativity...