
John Simmons sent me a 4001LH to refinish...
A classic bass from a classic Rickenbacker era, which has really had to work hard for its keep, judging from the number of mods done to it over the decades...
Here's how it looked upon arrival. Nicely aged MG, a fair amount of wear; everything looks like about 8/10 to the casual eye:
http://img.photobucket.com/albums/v693/jingle_jangle/1972%204001%20LH/arrived.jpg
http://img.photobucket.com/albums/v693/jingle_jangle/1972%204001%20LH/arrived2.jpg
My job is to bush the tuner holes for the correct items, fill any extraneous holes in the face, strip the body and fretboard, but leave the frets intact, and refinish in another color (to be revealed!).
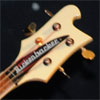
Here are the tuners that are on it, which required that the headstock holes be hogged out to 1/2" diameter. Judging from the completely burnt edges on these holes and their oval nature, this was another amateur Dremel-with-a-sanding-drum job. Permits ought to be required to use those things. They are the guitar butchers' friend, that's fer sure...
http://img.photobucket.com/albums/v693/jingle_jangle/1972%204001%20LH/tuners.jpg
We begin to disassemble it. Pull the pickguard, unsolder the bridge pickup leads, unscrew the jacks, take off the TRC and jackplate.
Here's what I found under the TRC:
http://img.photobucket.com/albums/v693/jingle_jangle/1972%204001%20LH/uh-oh.jpg
This guitar has been running round wounds for awhile, apparently. The truss rod nuts were maxed out, and the rectangular washer was distorted beyond repair. The photo below was taken after I had loosened the nuts. Both rod tips were bent into the rout. These can be carefully restored:
http://img.photobucket.com/albums/v693/jingle_jangle/1972%204001%20LH/uh-oh.jpg
http://img.photobucket.com/albums/v693/jingle_jangle/1972%204001%20LH/washer.jpg
Here are the rods with their nuts off:
http://img.photobucket.com/albums/v693/jingle_jangle/1972%204001%20LH/rods.jpg
And here they are after I got them pulled:
http://img.photobucket.com/albums/v693/jingle_jangle/1972%204001%20LH/rodsout.jpg
They will be re-arched and the threads re-cut and extended a bit.
Next, I turned my attention to the body itself. The bridge pickup rout is normal and factory-original. The coax rout from the bridge pickup to the control cavity is also a typical earlier factory Forstner-substituting-for-router job.
http://img.photobucket.com/albums/v693/jingle_jangle/1972%204001%20LH/purout.jpg
http://img.photobucket.com/albums/v693/jingle_jangle/1972%204001%20LH/routs.jpg
But, look at the outer edge of the factory control cavity Forstner-rout. Someone has enlarged the cavity, using a couple of dozen 1/8" drill holes and apparently a screwdriver, to modify the cavity, probably to fit a non-original pickguard.
Here's a closeup of this hack. Nice job!
http://img.photobucket.com/albums/v693/jingle_jangle/1972%204001%20LH/hackhack.jpg
A lot of patience to drill all those holes, and then--BAM!!!--he runs out of patience and just chews it up with a hammer (or a large rock that was hanging around the cave?) and a screwdriver...
'72 4001LH REFINISH
Moderators: rickenbrother, ajish4
-
jingle_jangle

- RRF Moderator
- Posts: 22679
- Joined: Wed Dec 22, 2004 6:00 am
- Contact:
'72 4001LH REFINISH
“I say in speeches that a plausible mission of artists is to make people appreciate being alive at least a little bit. I am then asked if I know of any artists who pulled that off. I reply, 'The Beatles did.”
― Kurt Vonnegut
― Kurt Vonnegut
-
jingle_jangle
- RRF Moderator
- Posts: 22679
- Joined: Wed Dec 22, 2004 6:00 am
- Contact:
The finish was stripped by sanding it carefully. MG is easier to strip than the colored finishes.
Now it's time to take stock and look at the work ahead. In the photo below, the holes to be filled are marked with light blue arrows:
http://img.photobucket.com/albums/v693/jingle_jangle/1972%204001%20LH/holefill.jpg
Looking at the headstock, here's what's on top. There are no less than three different sets of TRC holes, a few of which were extraneous (blue arrows, again):
http://img.photobucket.com/albums/v693/jingle_jangle/1972%204001%20LH/hsrepairs.jpg
The red arrow shows one of the the enlarged tuner post holes--you can see the charred edges that I mentioned before.
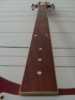
The fretboard was sanded to remove all the old CV. This is quite rewarding, because the tropical hardwood used on Rickenbacker fretboards, is quite durable and fade-proof, and always comes up nicely with some stripping and/or sanding. This bass also got a light fret levelling, as the first four frets were slightly worn:
http://img.photobucket.com/albums/v693/jingle_jangle/1972%204001%20LH/fretboard5.jpg
Next the bass was carefully sanded to #320 grit and taken into the booth and sealed:
http://img.photobucket.com/albums/v693/jingle_jangle/1972%204001%20LH/readyseal1.jpg
http://img.photobucket.com/albums/v693/jingle_jangle/1972%204001%20LH/readyseal2.jpg
This is the turnaround point. From now on, this bass gains in beauty. New installments later this week!
Now it's time to take stock and look at the work ahead. In the photo below, the holes to be filled are marked with light blue arrows:
http://img.photobucket.com/albums/v693/jingle_jangle/1972%204001%20LH/holefill.jpg
Looking at the headstock, here's what's on top. There are no less than three different sets of TRC holes, a few of which were extraneous (blue arrows, again):
http://img.photobucket.com/albums/v693/jingle_jangle/1972%204001%20LH/hsrepairs.jpg
The red arrow shows one of the the enlarged tuner post holes--you can see the charred edges that I mentioned before.
The fretboard was sanded to remove all the old CV. This is quite rewarding, because the tropical hardwood used on Rickenbacker fretboards, is quite durable and fade-proof, and always comes up nicely with some stripping and/or sanding. This bass also got a light fret levelling, as the first four frets were slightly worn:
http://img.photobucket.com/albums/v693/jingle_jangle/1972%204001%20LH/fretboard5.jpg
Next the bass was carefully sanded to #320 grit and taken into the booth and sealed:
http://img.photobucket.com/albums/v693/jingle_jangle/1972%204001%20LH/readyseal1.jpg
http://img.photobucket.com/albums/v693/jingle_jangle/1972%204001%20LH/readyseal2.jpg
This is the turnaround point. From now on, this bass gains in beauty. New installments later this week!
“I say in speeches that a plausible mission of artists is to make people appreciate being alive at least a little bit. I am then asked if I know of any artists who pulled that off. I reply, 'The Beatles did.”
― Kurt Vonnegut
― Kurt Vonnegut
-
sloop_john_b

- Rick-a-holic
- Posts: 13843
- Joined: Tue Jan 25, 2005 6:00 am

-
bassduke49

- Senior Member
- Posts: 6580
- Joined: Wed May 14, 2003 5:00 am

If you wish to see the bass as it was when I bought it about 5-6 years ago, here is a link to it:
http://www.homestead.com/aurs3/leftybass.html
The bass had many mods: tuners, bridge p/up(V63), bridge/tailpiece(V63), pickguard and knobs(V63)...you get the picture..plus a wacky looking TRC from a post 1988 bass.
After I bought the 72 4001 LH that was used on the Forum bass t-shirt, I was going to sell this bass. For a while I had started scrounging for parts to put back correctly and sell it---I bought a new lefty wiring harness from RIC and input jacks. The high-gain was purchased from a circa 1973 bass, it's not quite early enough for a 72 but it'll do nicely....oh yeah, I saved a good set of wavy Grovers for it too. Anyhoo----
Feeling bored one day I decided to get the soldering iron out and get it going again, I hadn't played it in about two years. With the high-gain and the toaster I thought it would sound good. I was right. It sounds REAL good.
So, I decided to keep it and really bring it back right, or as right as we can. I sent it out to Paul to work some magic and TLC on it, and I thought it was a good basis for a restoration.
-
rickaddict
- Senior Member
- Posts: 6163
- Joined: Mon Mar 29, 2004 7:46 am
Paul wrote:
But, look at the outer edge of the factory control cavity Forstner-rout. Someone has enlarged the cavity, using a couple of dozen 1/8" drill holes and apparently a screwdriver, to modify the cavity, probably to fit a non-original pickguard.
Believe it or not, some of this may be factory, although this bass has had many incarnations. I (along with others) have seen other vintage Rickenbackers of many different types, in much better condition (read: Unaltered) that have had similar finish work under the guard in order to make things fit. I believe most of this kind of alteration was done at the assembly table, surely after the body and neck were finished. Of course with the way things are done now at RIC I doubt if this kind of thing is done...way back when, highly probable. YMMV of course...
-
atomic_punk

- Senior Member
- Posts: 5093
- Joined: Wed Sep 17, 2003 5:00 am
- Contact:
Well, I'm no luthier for sure, LOL... but a Forstner rout is not as precise as the process that was used for the rightys. Even so, I have seen right-handed Rickenbackers that have had a little trim-work done in the cavity in this manner...a 320 from 1969 comes to mind that was sold on ebay about 2-3 years ago. On the older guitars it may have been more of a practice than we know...just part of the 'history' and the lore I guess.
The forstner was a way of life at Rickenbacker for years. The control cavity of my '63 4001 is entirely forstner cut - and not very well either. That little path from the controls to the neck pickup is a walk in the park compared with the crater crated by 1"+ bit used to make the cavities. BTW - the righties have the forstner cut cavity to neck pickup route too. I think they changed the process to use a router (shaper?) around '79 - '80.
