Page 1 of 2
BASSO PROFUNDO
Posted: Thu Mar 16, 2006 3:28 pm
by jingle_jangle
Posted: Thu Mar 16, 2006 3:29 pm
by jingle_jangle
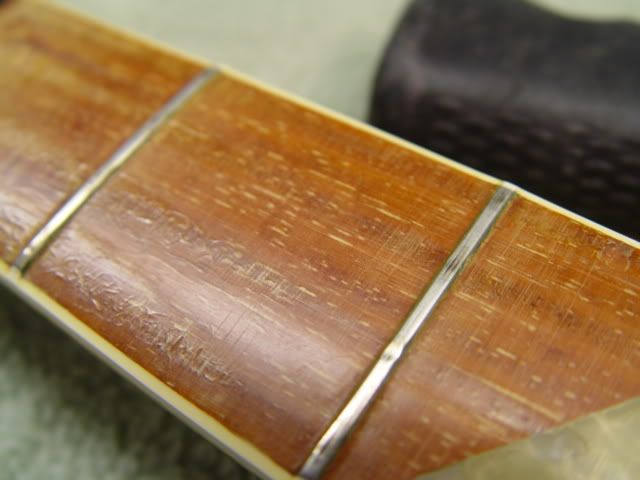
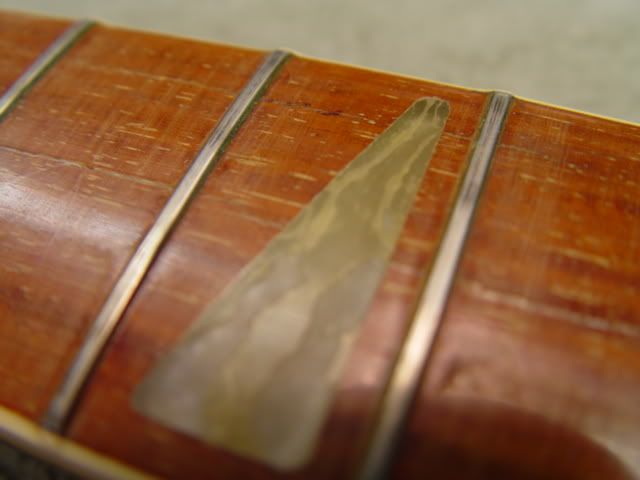
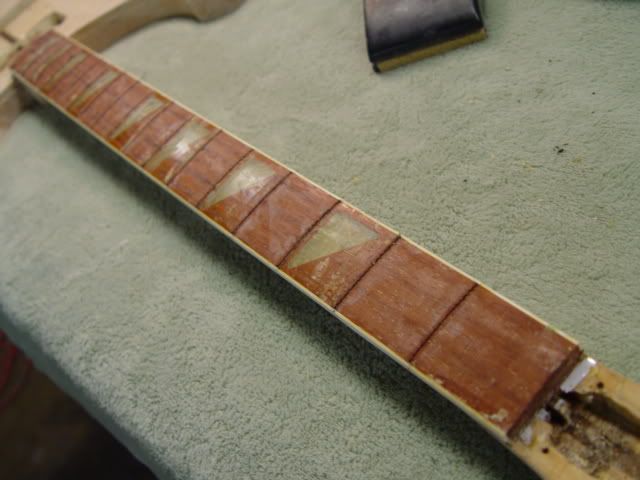
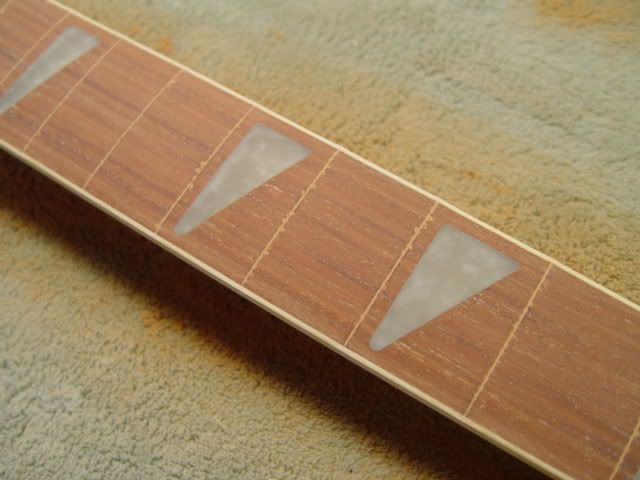
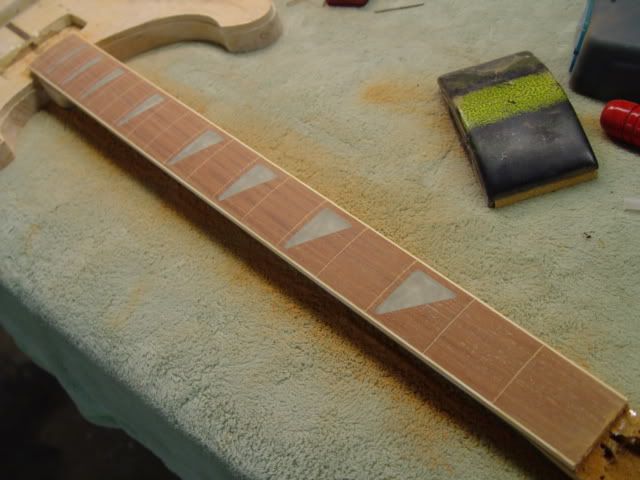
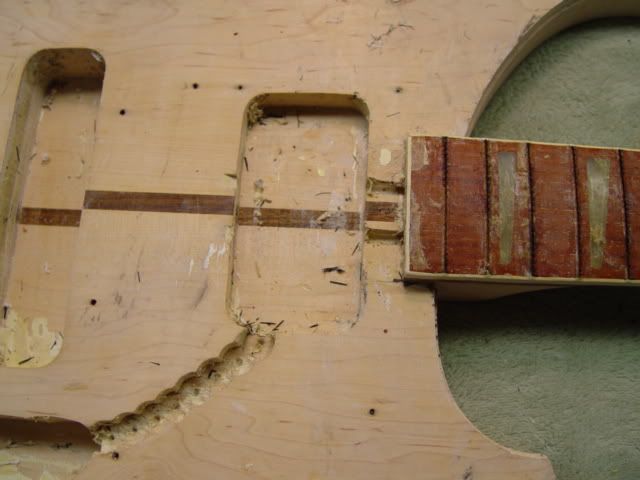
After evaluation and disassembly, it went through the usual defretting and stripping process except that I chemically-stripped the whole bass, since the black binding was coming off anyway. Out of courtesy to the inlays, however, the fretboard varnish was completely sanded off--no chemicals. Two grits were used: 150 and 320, until it was satin-smooth. The board on this was in particularly bad shape and many splinters came out although great care was taken in defretting. The splinters were cautiously super-glued back into place with the aid of magnifying goggles and a Swiss tweezers.
http://img.photobucket.com/albums/v693/jingle_jangle/1979%204001BT/defretted.jpg
http://img.photobucket.com/albums/v693/jingle_jangle/1979%204001BT/boardsandcu.jpg
http://img.photobucket.com/albums/v693/jingle_jangle/1979%204001BT/boardsand.jpg
http://img.photobucket.com/albums/v693/jingle_jangle/1979%204001BT/stripped1.jpg
http://img.photobucket.com/albums/v693/jingle_jangle/1979%204001BT/stripped2.jpg
http://img.photobucket.com/albums/v693/jingle_jangle/1979%204001BT/stripped3.jpg
Posted: Thu Mar 16, 2006 3:29 pm
by jingle_jangle
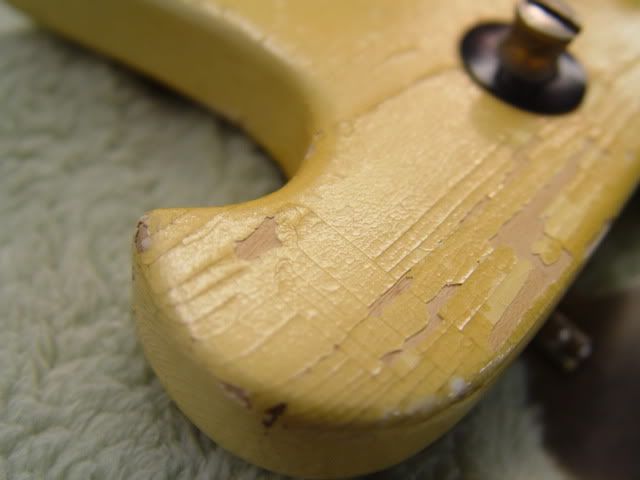
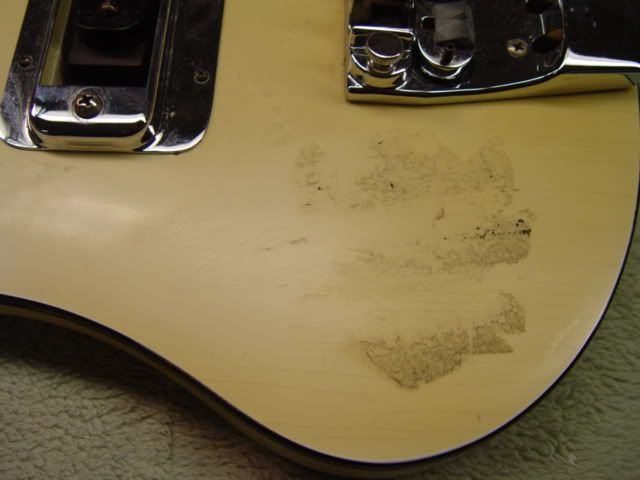
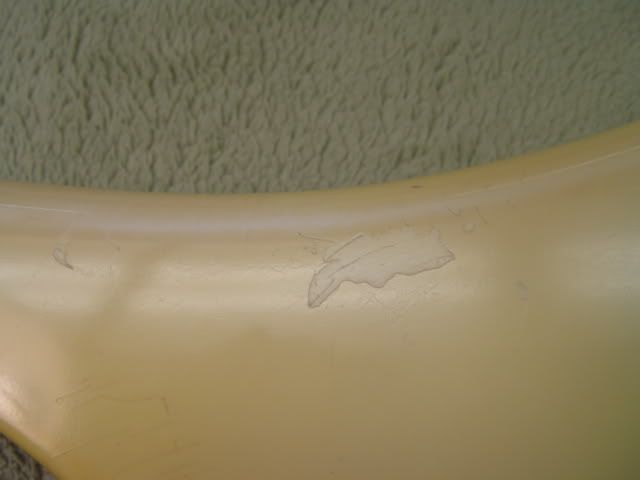
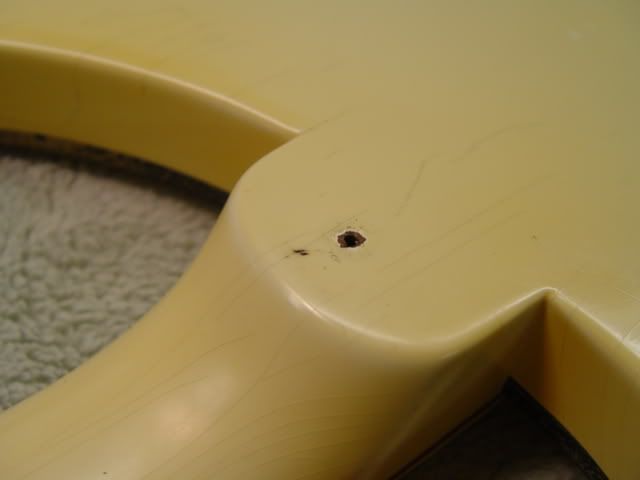
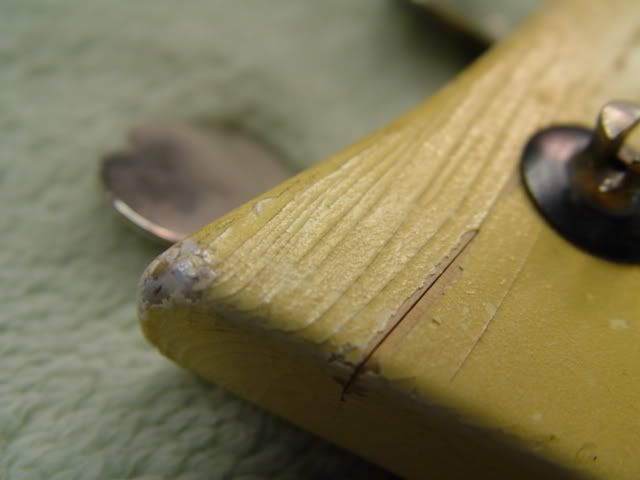
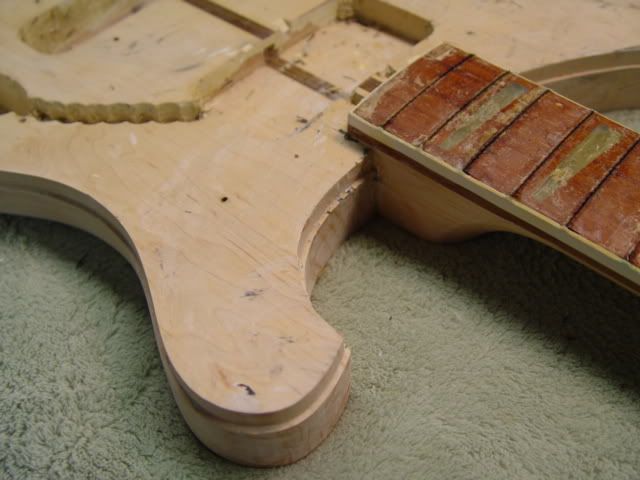
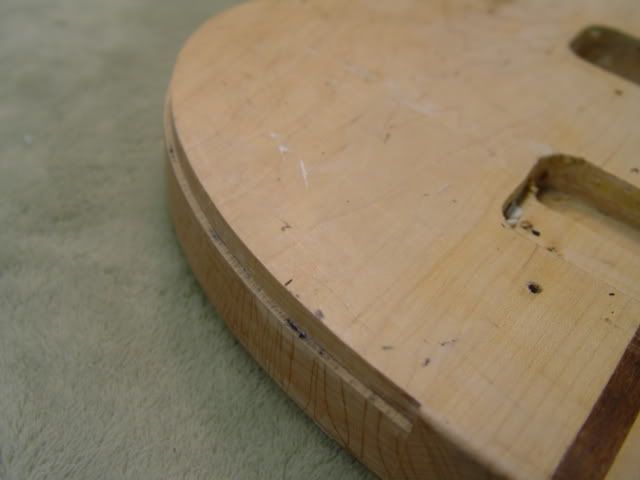
All the finish checking led to what I call "spiders", when dirt and moisture find their way into the wood beneath the cracks, leaving a replica of the checking pattern in the wood itself, which must be bleached out.
If you look at the edge of the bass below the binding rout, you'll see the pattern of spiders left in the end-grain of the maple.
http://img.photobucket.com/albums/v693/jingle_jangle/1979%204001BT/spiders.jpg
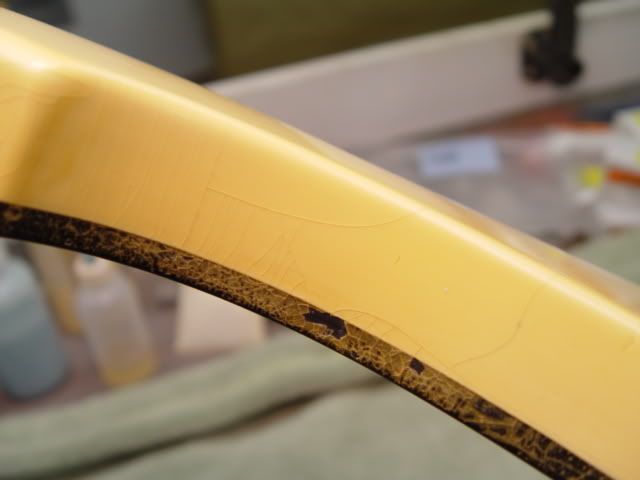
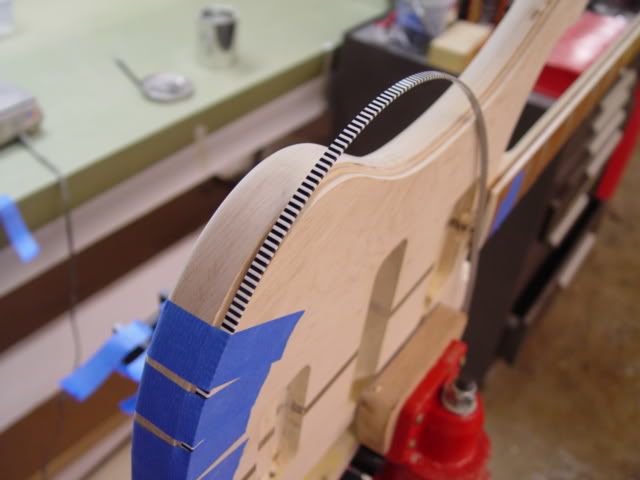
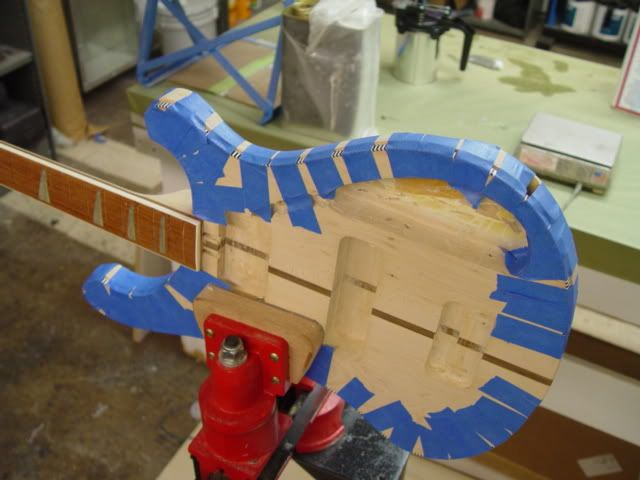
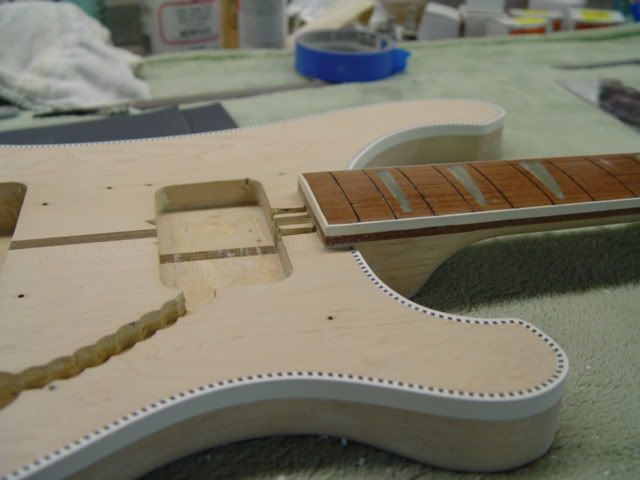
Once the body and neck were stripped and sanded, the whole bass was sanded with #150 and then with #320 until it was smooth as can be. Then it was time to cut a channel for the checkerboard binding, which sits inside of the white binding. 80% of this channel, measuring 7/32" wide by 1/16" deep, could be cut with a small router. The remaining 20% had to be hand-cut with a very sharp chisel, as the neck and fretboard interfered with the router base.
After this was done, the checkerboard binding was cut to rough length, glued into the channel and taped into place to set up. It takes LOTS of tape, as you can see. I prefer this to the standard rubber bands and properly done it clamps just as well.
http://img.photobucket.com/albums/v693/jingle_jangle/1979%204001BT/necksand.jpg
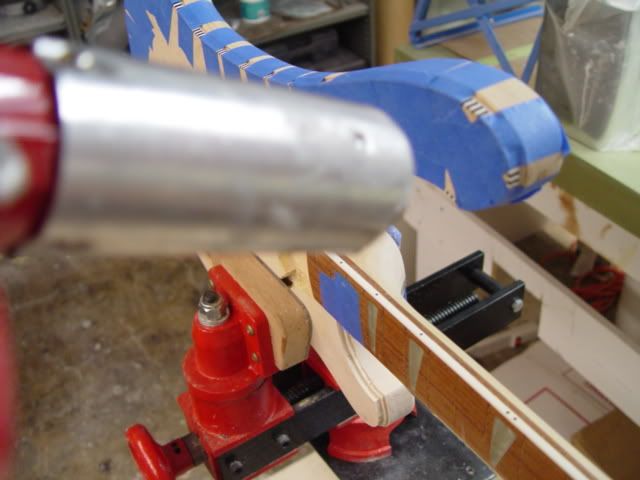
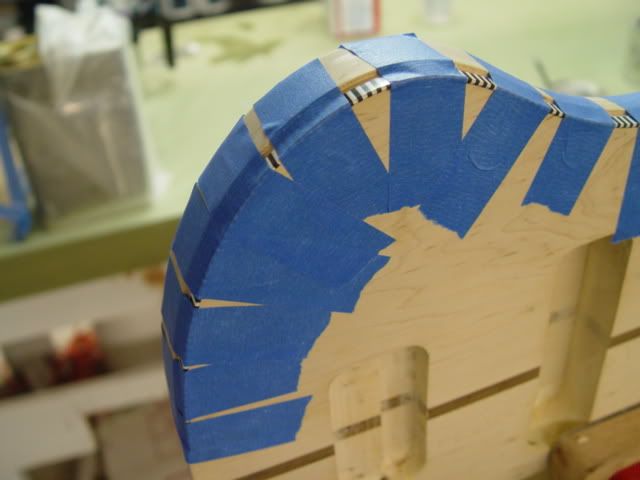
A heat gun is used to spot-soften the binding to get it around those sharp horns.
http://img.photobucket.com/albums/v693/jingle_jangle/1979%204001BT/heatgun.jpg
The binding is worked around the body and taped solid. I use a glue made of celluloid binding scraps dissolved in ethylene dichloride. This works better than the old binding-in-acetone formula; it penetrates better and hardens much faster.
http://img.photobucket.com/albums/v693/jingle_jangle/1979%204001BT/checkerglue.jpg
http://img.photobucket.com/albums/v693/jingle_jangle/1979%204001BT/checkerbound.jpg
http://img.photobucket.com/albums/v693/jingle_jangle/1979%204001BT/boundcu2.jpg
http://img.photobucket.com/albums/v693/jingle_jangle/1979%204001BT/boundcu.jpg
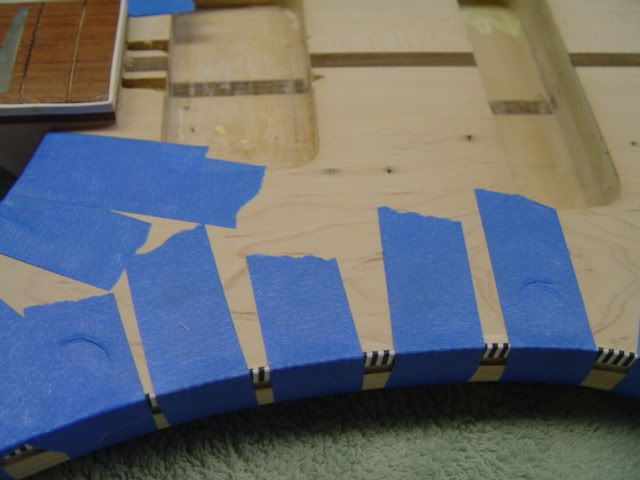
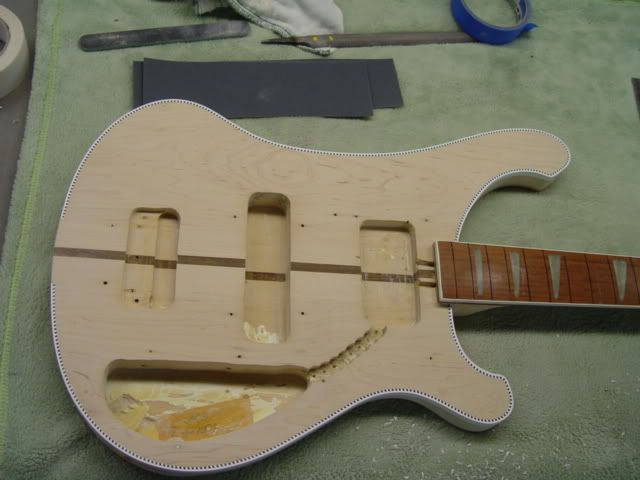
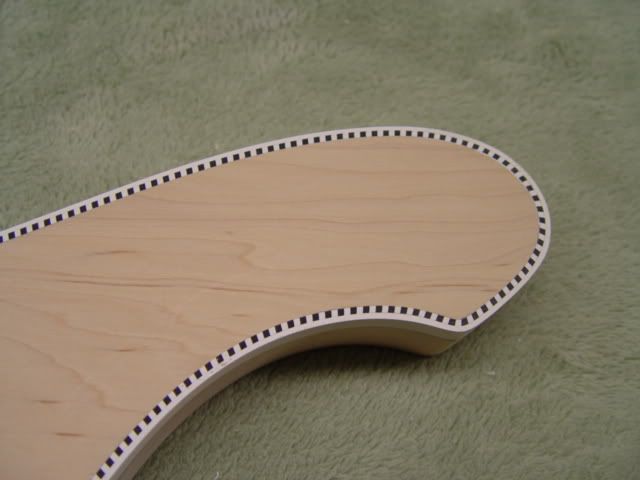
After an overnight drying period, the white celluloid binding was glued and taped into place over the checkerboard. The taping drill was repeated. You will note that both layers of binding were sized slightly wider than their respective slots, so that each layer stood a bit proud of the surface of the bass. This is standard practice, as after hardening the binding is scraped nearly flush with the surface and sanded the last few thousandths of an inch, until the surfaces are continuous. A bit of scraping is usually necessary on the guitar's edges, too to get the binding/wood seam absolutely flat and gap-free.
http://img.photobucket.com/albums/v693/jingle_jangle/1979%204001BT/tapeoffhorn.jpg
http://img.photobucket.com/albums/v693/jingle_jangle/1979%204001BT/horncu.jpg
Posted: Thu Mar 16, 2006 3:29 pm
by jingle_jangle
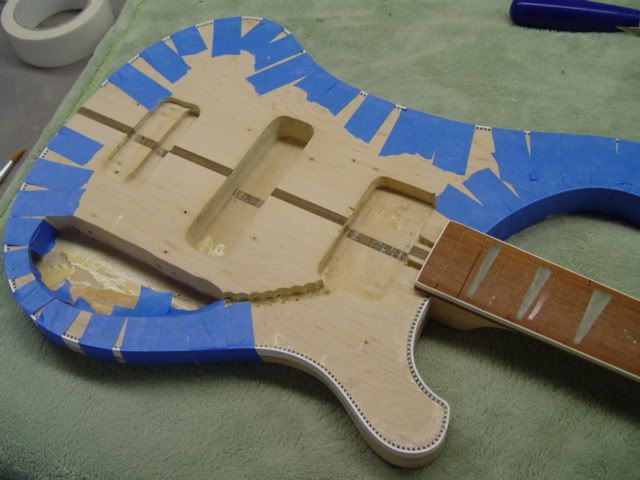
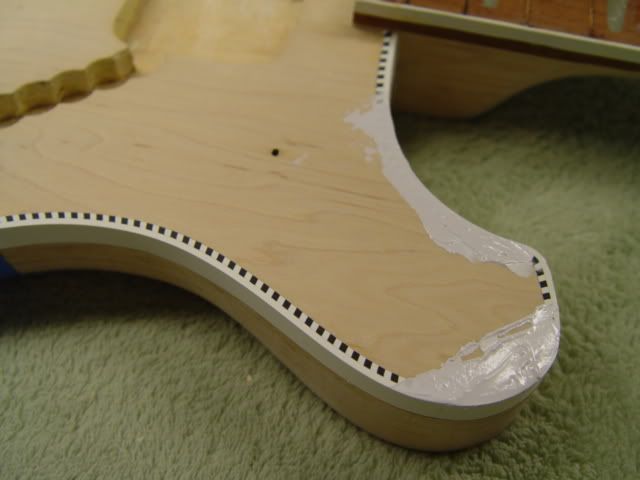
Oftentimes a thickened version of he glue concoction, called "mud" is used to fill tiny gaps and spaces in the binding. I add a bit of whiting powder to my "mud" to thicken it and make it pure white to match the binding.
http://img.photobucket.com/albums/v693/jingle_jangle/1979%204001BT/boundbody.jpg
http://img.photobucket.com/albums/v693/jingle_jangle/1979%204001BT/horncu.jpg
http://img.photobucket.com/albums/v693/jingle_jangle/1979%204001BT/mudfill.jpg
After the binding has been touched-up (this bass needed it in four small spots), the entire body is sanded to #320 in preparation for sealer.
http://img.photobucket.com/albums/v693/jingle_jangle/1979%204001BT/bindingsand.jpg
http://img.photobucket.com/albums/v693/jingle_jangle/1979%204001BT/hornsandcu.jpg
http://img.photobucket.com/albums/v693/jingle_jangle/1979%204001BT/sanded.jpg
http://img.photobucket.com/albums/v693/jingle_jangle/1979%204001BT/readycu.jpg
...And that's where it stands at this moment, while I spray color onto Melissa's 481. While her guitar's curing prior to color-sanding, rub out and assembly, I'll be getting this bass sealed, refretted, and painted with its AFG finish.
Posted: Thu Mar 16, 2006 3:56 pm
by melibreits
BEAUTIFUL Checkered binding--Geez, I love the looks of that!

....And so glad to hear that my 481 is getting its color treatment!
Paul, the amount of things you get done in a day are amazing--and the fact that you still take the time to show us these amazing processes step-by-step with photos and explanations! ...And you somehow work a regular job besides? What's your secret for that kind of productivity? Are you one of those people that thrives on just three hours of sleep each night?
Posted: Thu Mar 16, 2006 4:31 pm
by ozover50
Five gold stars and a "well done" note from the headmaster, Paul! Lovely work once again.... and well photographed, also. I almost feel as I'm there watching.....
Posted: Thu Mar 16, 2006 5:05 pm
by clearblue
Extremely interesting. Especially the binding process. I wasn't aware how the checkerboard binding looked before it was put on.
Posted: Thu Mar 16, 2006 5:57 pm
by jingle_jangle
Credit for photography goes to my superb camera--a two-year-old Sony DSC-F717, which has the best lens I've ever used digitally speaking. I highly recommend one, although it is a bit bulky. With a 256MB chip, it will take 1,000 medium-res 640X480 snapshots before the chip needs downloading!
Melissa, I get six hours a night. Goes back to Brasil, where the sun rose at 4:45 each morning, year 'round. Got into the habit of getting up at that time, and haven't needed an alarm clock since.
I work through my lunch hour and at least 3 hours per evening. Then there's weekends, too...
BTW, Melissa, the color is done on the 481, and it'll get varnish tomorrow.
Posted: Thu Mar 16, 2006 6:09 pm
by harvey49
Oooo good one!! Another project to track the progress of. Good thing you've got a high work ethic Paul, I can't stand a long wait between installments. Patience is not one of my strong points.
Posted: Thu Mar 16, 2006 6:12 pm
by clearblue
The DSC-F717 has a Carl Zeiss Lens. So did my DSC-S75. Great cameras.
Posted: Thu Mar 16, 2006 7:33 pm
by jingle_jangle
The Zeiss lens was the factor that made me choose a Sony over the Nikon Digital I went in to purchase. This is my second Sony digital and I'm very pleased.
Posted: Fri Mar 17, 2006 2:30 am
by jwilli
A little off topic but I'm in the market for a new digital camera. My last one was a Sony with Zeiss lens. Seems that customs in either Mexico or the US decided that they needed it more than I did. I guess that i should've packed it in my carry on. ;-(
Posted: Fri Mar 17, 2006 3:11 am
by dswp
Paul, is it possible to install the checkered binding and not need to refinish the body?
Posted: Fri Mar 17, 2006 5:24 am
by jingle_jangle
Dave, I suppose anything is possible, but conversion varnish is not that forgiving, unfortunately. There is a near-certainty of a chip in the varnish somewhere along the line, and when varnish chips, it takes the body color with it. The result is lots of touch-ups on solids and MG. Touch-ups are tricky on burst finishes.
John, now that the latest Sonys have come out, the former top-of-the-line DSC-F828 is available on eBay at terrific prices, well under a grand.
Posted: Fri Mar 17, 2006 5:51 am
by kcole4001
Very nice!