
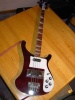
So I'm still plugging away at Cinderella, my savaged 72 Burgundyglo 4001. It is improving, much more than I ever thought possible before stumbling onto these forums. But one thing always leads to another...
When I removed the truss rod cover, an event that has not happened in at least 17 years, some of the paint came away from the back of it. The black "r" at the end of Rickenbacker stuck to the finish, the top half of it anyway, and about a half of a square inch of white as well, in a few different spots. When I put it back in place, the black "r" lines right up and looks fine, so given my lack of experience I intend to leave that as it is. But there are missing patches of white that do seem easy enough for me to touch up. What sort of paint should I use to touch up the lost white spots, and how best to apply it?
Truss Rod Cover Touch Up
Moderator: jingle_jangle
-
lyle_from_minneapolis
- Advanced Member
- Posts: 2530
- Joined: Sun Nov 19, 2006 7:13 pm
Truss Rod Cover Touch Up
Here is where I hide my music:
http://www.soundclick.com/MarkKaufman
http://www.soundclick.com/MarkKaufman
-
jingle_jangle

- RRF Moderator
- Posts: 22679
- Joined: Wed Dec 22, 2004 6:00 am
- Contact:
White-out is a good solution, but do make sure it matches before you do the whole area, because it can't be easily removed, as it's solvent-based. On difficult ones with large areas missing, I tend to prefer a water-based artist's or craft acrylic, which can be tinted with a bit of black and/or yellow ochre to get the exact shade of the aged original paint. Advantage is that it can be wiped away with a damp cloth without causing damage or softening of the original paint. This is true of the black lettering, too, if you're feeling brave!
“I say in speeches that a plausible mission of artists is to make people appreciate being alive at least a little bit. I am then asked if I know of any artists who pulled that off. I reply, 'The Beatles did.”
― Kurt Vonnegut
― Kurt Vonnegut
-
lyle_from_minneapolis
- Advanced Member
- Posts: 2530
- Joined: Sun Nov 19, 2006 7:13 pm
I am feeling chicken, actually.
Thank you once again, grandmasters!
Thank you once again, grandmasters!
Here is where I hide my music:
http://www.soundclick.com/MarkKaufman
http://www.soundclick.com/MarkKaufman
I have a similar problem with a 4001CS pickguard around at least 4 screws (fortunately, not near limited edition signature). The areas are all relatively small -- and all white. Do you think water-based acrylic is the answer here as well? What preparation would you recommend prior to application? How do I prevent this from happening again? Thanks in advance for your help.
-
jingle_jangle
- RRF Moderator
- Posts: 22679
- Joined: Wed Dec 22, 2004 6:00 am
- Contact:
Similar problem=similar solution. The CS guard is manufactured like a vintage nameplate (TRC): clear acrylic, painted on the back. So it could be touched up with water-based acrylic paint, white-out, or Testor's or Pactra hobby enamel. Just make sure it is a close match...
Richard, does your CS have a brownish area around each toaster mounting screw?
Richard, does your CS have a brownish area around each toaster mounting screw?
“I say in speeches that a plausible mission of artists is to make people appreciate being alive at least a little bit. I am then asked if I know of any artists who pulled that off. I reply, 'The Beatles did.”
― Kurt Vonnegut
― Kurt Vonnegut
Yes, though faint, there is a brownish area around each mounting screw. Looks like it's a combination of residue from the rubber grommets and rust from the toaster mounting screws. Maybe I should use either some of the same tape (what kind is this?) that RIC installs under the switch and pots or nylon washers under these grommets?
Now that I have the pickguard removed, I can see it's going to need a bit more cleaning-up/touching-up than I had originally thought. I just purchased this bass and it looks like the previous owner exposed the bass to more than its share of moisture over the years. I'd bet that excessive moisture was the main cause of the problem. There's also some (relatively minor) rust and pitting on the HS mounting plate. Any suggestions for this?
Now that I have the pickguard removed, I can see it's going to need a bit more cleaning-up/touching-up than I had originally thought. I just purchased this bass and it looks like the previous owner exposed the bass to more than its share of moisture over the years. I'd bet that excessive moisture was the main cause of the problem. There's also some (relatively minor) rust and pitting on the HS mounting plate. Any suggestions for this?
-
jingle_jangle
- RRF Moderator
- Posts: 22679
- Joined: Wed Dec 22, 2004 6:00 am
- Contact:
Richard, that brownish discoloration is a chemical reaction between the polyurethane paint on the back of the guard and the lamp black pigment in those rubber grommets. Tape won't help anything now.
Minor surface rust on chrome can be cleaned with Scratch-X on a soft cloth. Pitting is another matter entirely...there's no way to get rid of this, except to ditch the part and replace it.
It takes a WHOLE LOT of exposure to moisture to cause pitting on RIC chrome parts, as their plating is to a very high specification. And if you're seeing rust on the toaster mounting screws, my advice is new fasteners all around, and replace the pitted parts. Are the frets OK or green around the edges?
“I say in speeches that a plausible mission of artists is to make people appreciate being alive at least a little bit. I am then asked if I know of any artists who pulled that off. I reply, 'The Beatles did.”
― Kurt Vonnegut
― Kurt Vonnegut
On closer inspection, I don't see any rust on the toaster mounting screws. I just assumed that the brownish color was rust. If it's a chemical reaction with the paint, would it make sense to try to remove the paint and touch up these areas too (or just leave well enough alone)?
And regarding the already chipped off areas, should I assume that using any sort of abrasive (steel wool, etc.) would not be a good idea (because it would scratch the underside of the pickguard)? What would you suggest I do to smooth these areas prior to touch up?
The frets look like they're in pretty good shape ... and the bass was strung with flat wounds when I got it. I don't see any green around the edges, but if I wipe them gently with Scratch-X on a soft cloth (is it OK to do that?), some green color comes off.
-
jingle_jangle
- RRF Moderator
- Posts: 22679
- Joined: Wed Dec 22, 2004 6:00 am
- Contact:
1. Leave well enough alone. It's pigment migration, and it goes all the way through the paint. That's why you can see it on the top.
2. You don't need to roughen or smooth these areas up. Just touch up from the back. The new paint will blend seamlessly with the old, providing the color is fairly close.
3. You don't have to be too gentle with the Scratch-X...I buff frets and fretboards on a 12" wheel with abrasive compound, and they look fine when I'm done...so, go to it. Rub across the board, in the same direction the frets are oriented.
“I say in speeches that a plausible mission of artists is to make people appreciate being alive at least a little bit. I am then asked if I know of any artists who pulled that off. I reply, 'The Beatles did.”
― Kurt Vonnegut
― Kurt Vonnegut
-
atomic_punk

- Senior Member
- Posts: 5093
- Joined: Wed Sep 17, 2003 5:00 am
- Contact:
Paul, since you mentioned green on the frets, my '98 4003s5 has green on the edges of the frets top and bottom when looking at the neck. Is there something I can use to get rid of it? Is the Scratch-X you mentioned the best idea? (Probably the easiest...) 
"They make great f***'n basses". - Lemmy, NAMM 2009
-
jingle_jangle
- RRF Moderator
- Posts: 22679
- Joined: Wed Dec 22, 2004 6:00 am
- Contact:
If the green is not under the conversion varnish that's on the fretboard and down the sides of the frets, it will polish out with no problems using Scratch-X.
If, however, it has been caused by perspiration seeping between the fret's side and the CV, then the simplest remedy is to carefully trim the CV away from the fret side by scoring the varnish at the base of each fret, on both sides of each fret, using a new and very sharp #11 Exacto blade. You score with the knife tip at the inside corner where fret base meets the fretboard's surface. It helps to use an Opti-visor magnifying headband.
I have done this for customers who don't want their fretboards refinished, as part of the fret-polishing process. It takes about a half-hour to do properly, doesn't hurt the guitar or bass, and is undetectable to the naked eye.
Following this de-varnishing (you'll get two tiny slivers of varnish from each fret), the frets can be polished and will look as new.
“I say in speeches that a plausible mission of artists is to make people appreciate being alive at least a little bit. I am then asked if I know of any artists who pulled that off. I reply, 'The Beatles did.”
― Kurt Vonnegut
― Kurt Vonnegut
-
beatlefreak

- Senior Member
- Posts: 6160
- Joined: Wed Jun 14, 2006 5:45 am
- Contact:
-
lyle_from_minneapolis
- Advanced Member
- Posts: 2530
- Joined: Sun Nov 19, 2006 7:13 pm
That was one cool slice of knowledge.
This is SO much better than TV!
This is SO much better than TV!
Here is where I hide my music:
http://www.soundclick.com/MarkKaufman
http://www.soundclick.com/MarkKaufman